React의 라우팅 이해하기
전통적인 브라우저 - 서버
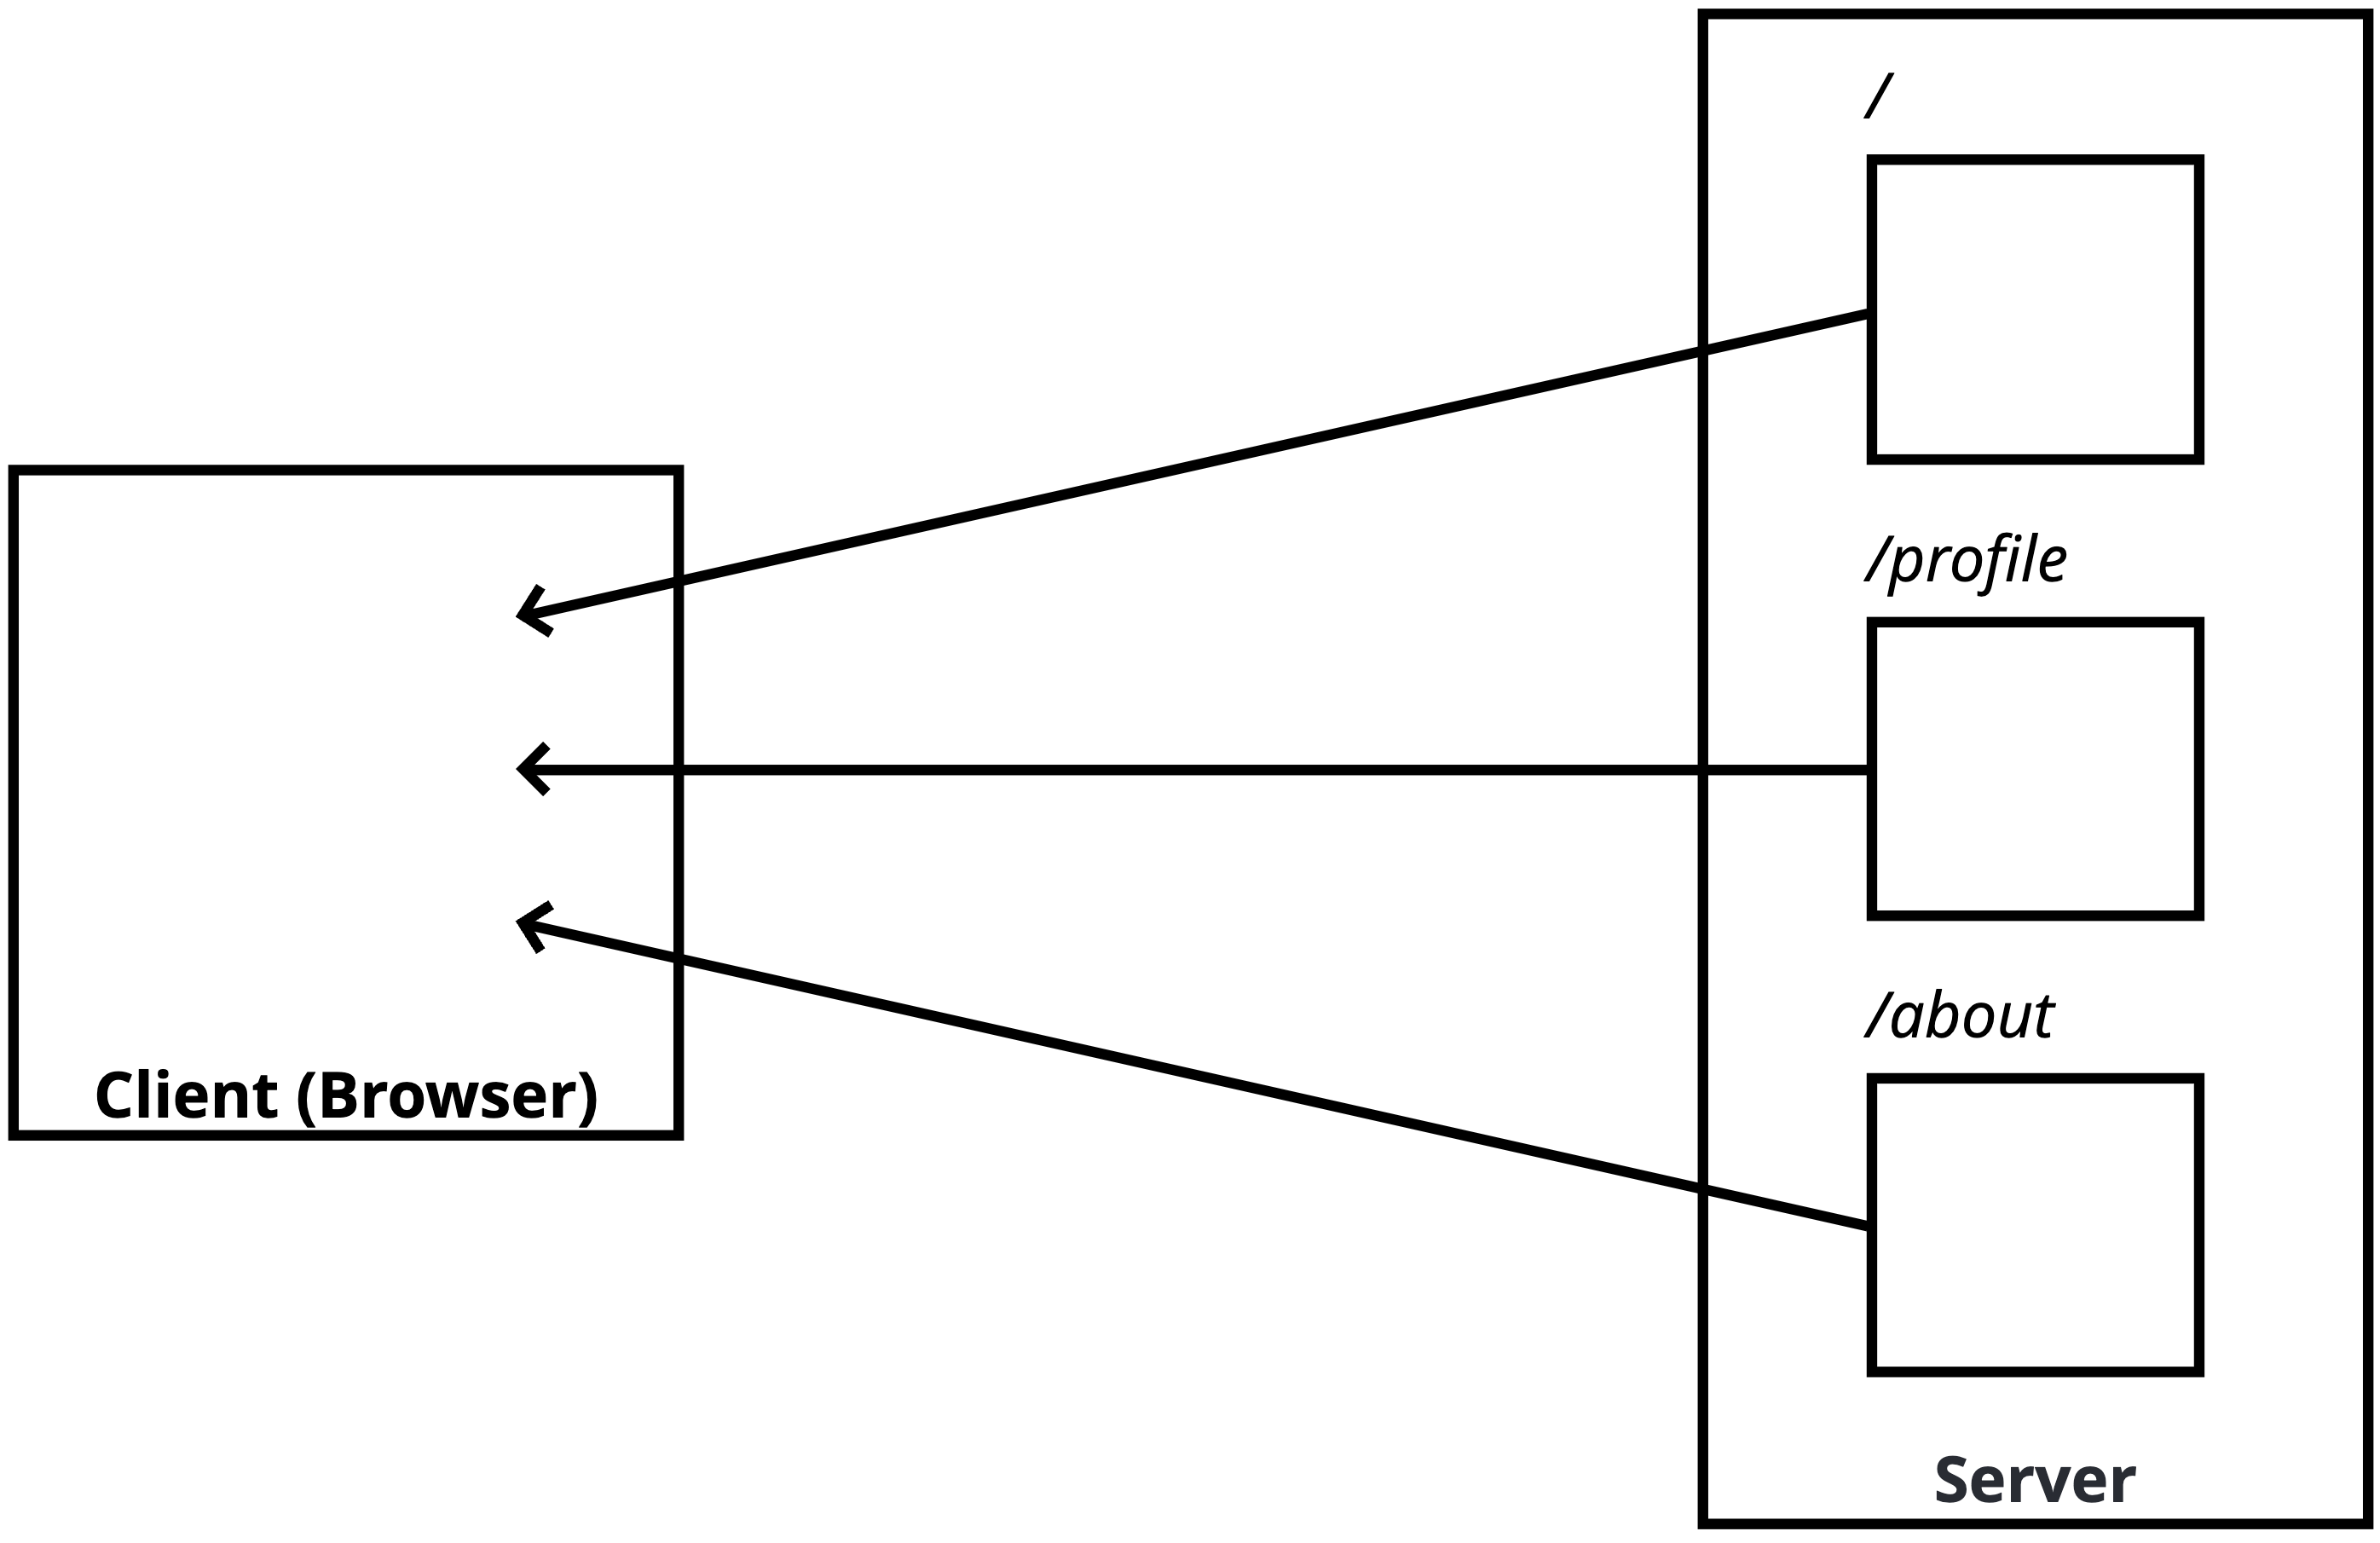
- URL을 바탕으로 html을 받아온다.
SPA(Single Page Application)

- 한번에 덩어리를 받아오고 내부적으로 URL을 맞춰서 표기하는 방식이다.
SPA 라우팅 과정
- 브라우저에서 최초에 '/' 경로로 요청을 하면,
- React Web App을 내려줍니다.
- 내려 받은 React App 에서 '/' 경로에 맞는 컴포넌트를 보여줍니다.
- React App 에서 다른 페이지로 이동하는 동작을 수행하면,
- 새로운 경로에 맞는 컴포넌트를 보여줍니다.
Recat Router는 내장 패키지가 아닙니다.
- cra에 기본 내장된 패키지가 아닙니다.
react-router-dom은 FaceBook의 공식 패키지가 아닙니다.- 가장 대표적인 라우팅 패키지 입니다.
# React route 설치 방법
npm i react-router-dom
실습
npx create-react-app react-router-example

npm i react-router-dom
! 300
src/pages디렉토리 생성후에About.jsx,Home.jsx,Profile.jsx를 생성하고 아래의 코드를 각각 넣습니다.
export default function 폴더명(){

return <div>폴더명 페이지 입니다.</div>

}
그리고 App.js에 들어가서 아래와 같이 코드를 수정해주면 됩니다.
fuction App(){
	return (
		<BrowerRouter>
			<Route path="/" componment={Home}/>
			<Route path="/profile" componment={Profile}/>
			<Route path="/about" componment={About}/>
		</BrowerRouter>
	);
}
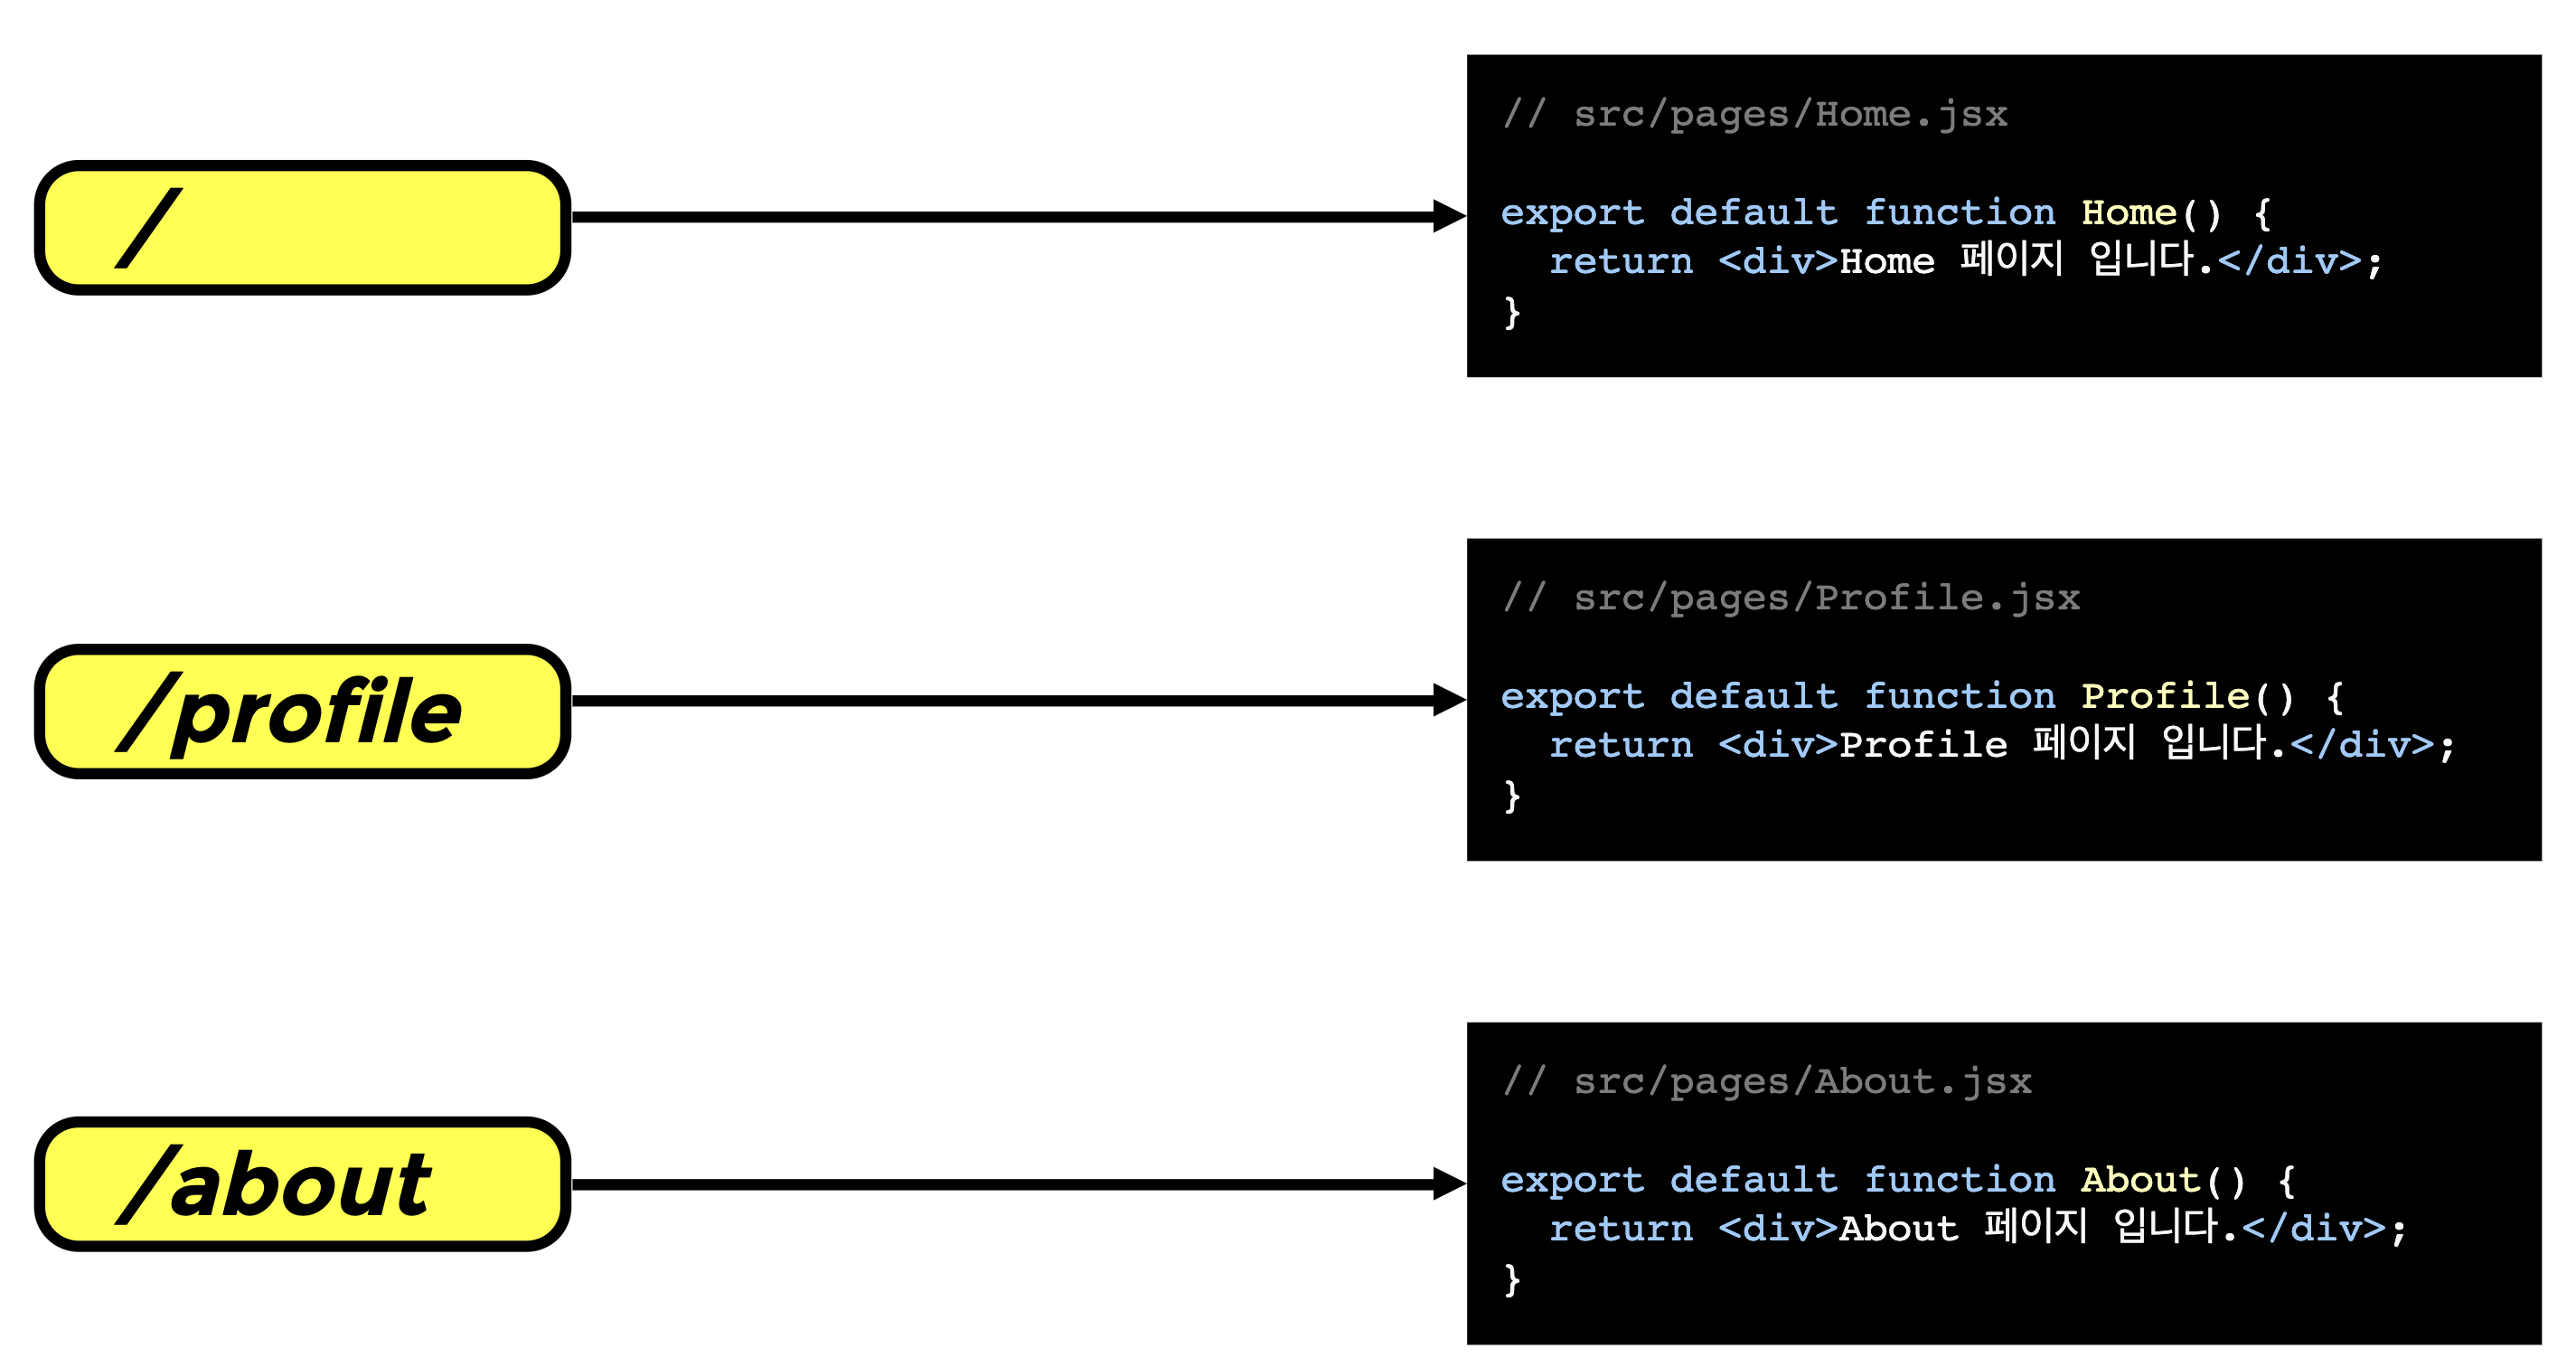
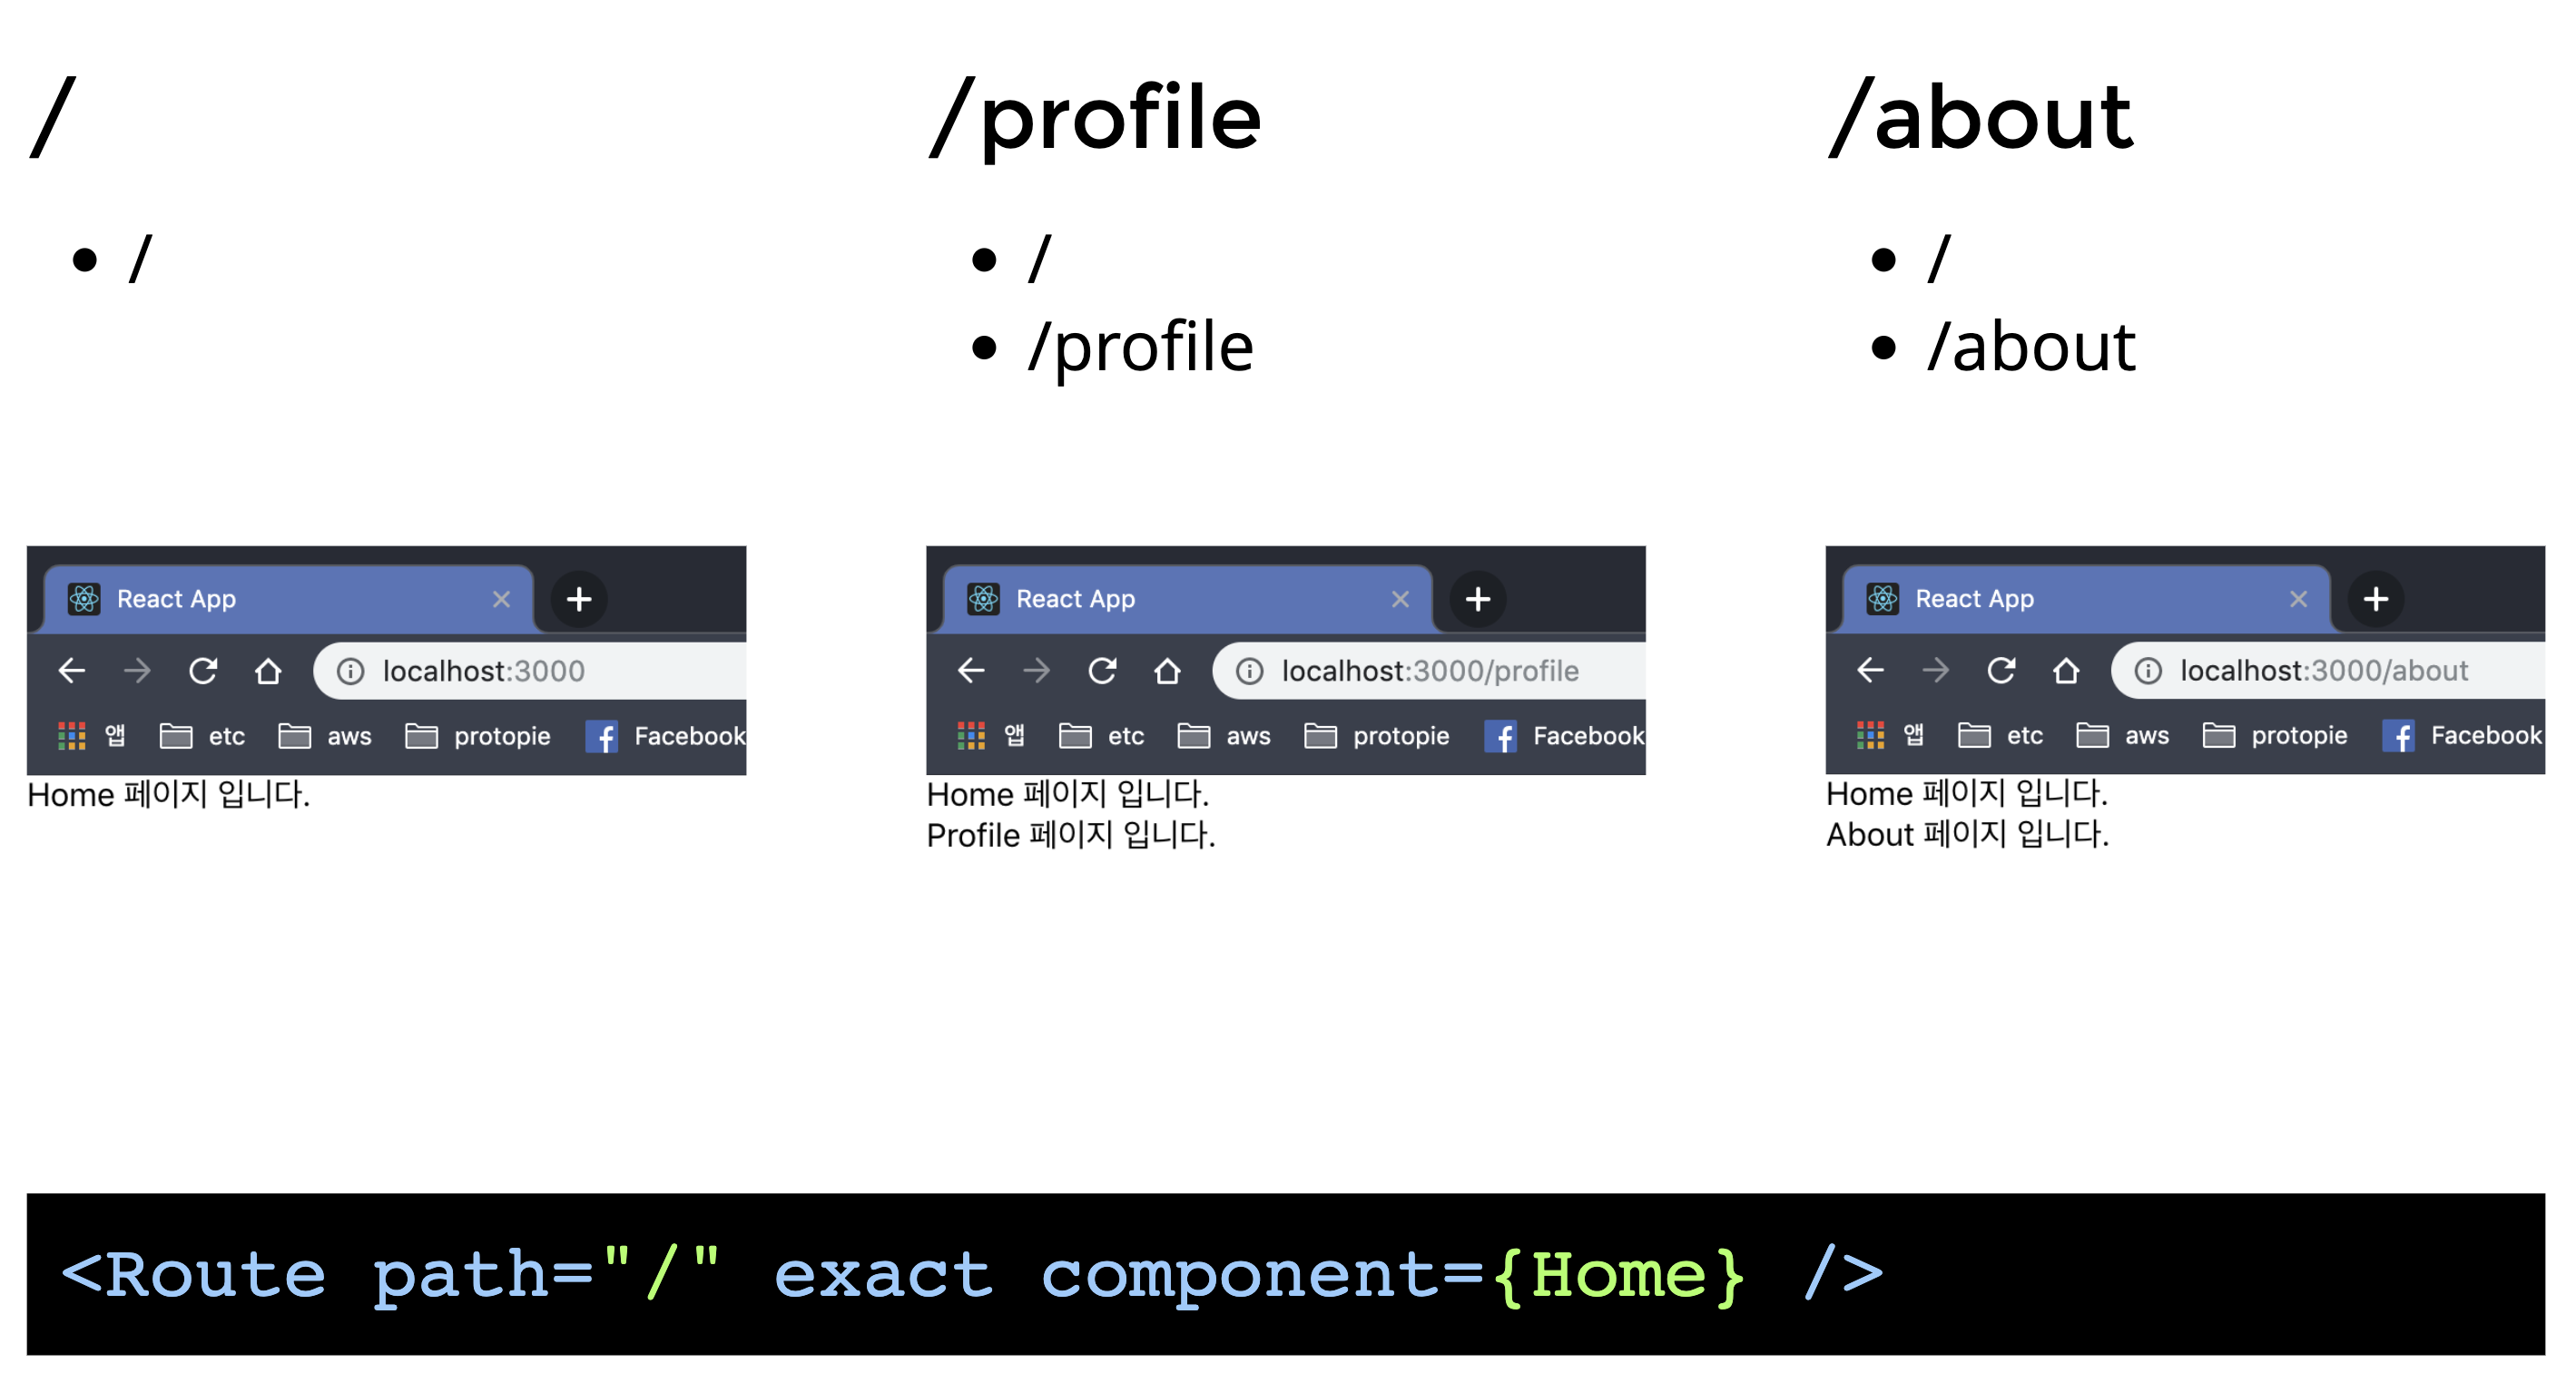
- 여기서 주의할 점은,
/는 모든 URL에 포함되서 나타나게 된다, 그렇기 때문에exact옵션을 붙여야지 겹치지 않게 출력이 가능하다.- 해당 방식은 완전 똑같은 매칭 방식에서만 보여주는 방식이다.
Dynamic 라우팅
- React에서 어떤식으로 동적 라우팅을 처리하는지 알아보겠다.
:id
import { BrowserRouter, Route } from 'react-router-dom';
import Home from './pages/Home';
import Profile from './pages/Profile';
import About from './pages/About';

function App() {
  return (
    <BrowserRouter>
      <Route path="/" exact component={Home} />
      <Route path="/profile" exact component={Profile} />
      <Route path="/profile/:id" component={Profile} />
      <Route path="/about" component={About} />
    </BrowserRouter>
  );
}

export default App;
App.jsx
export default function Profile(props) {
  const id = props.match.params.id;
  console.log(id, typeof id);
  return (
    <div>
      <h2>Profile 페이지입니다.</h2>
      {id && <p>id 는 {id} 입니다.</p>}
    </div>
  );
}
profile.jsx
-id는 숫자가 아닌 문자 데이터로 받아온다.
params & query
import { BrowserRouter, Route } from 'react-router-dom';
import Home from './pages/Home';
import Profile from './pages/Profile';
import About from './pages/About';

function App() {
  return (
    <BrowserRouter>
      <Route path="/" exact component={Home} />
      <Route path="/profile" exact component={Profile} />
      <Route path="/profile/:id" component={Profile} />
      <Route path="/about" component={About} />
    </BrowserRouter>
  );
}

export default App;
App.js
// src/pages/About.jsx

export default function About(props) {
  const searchParams = props.location.search;
  console.log(searchParams); //?name=mark
  return (
    <div>
      <h2>About 페이지 입니다.</h2>
    </div>
  );
}
About.jsx
- 해당 객체를 그냥 꺼내게 된다면,
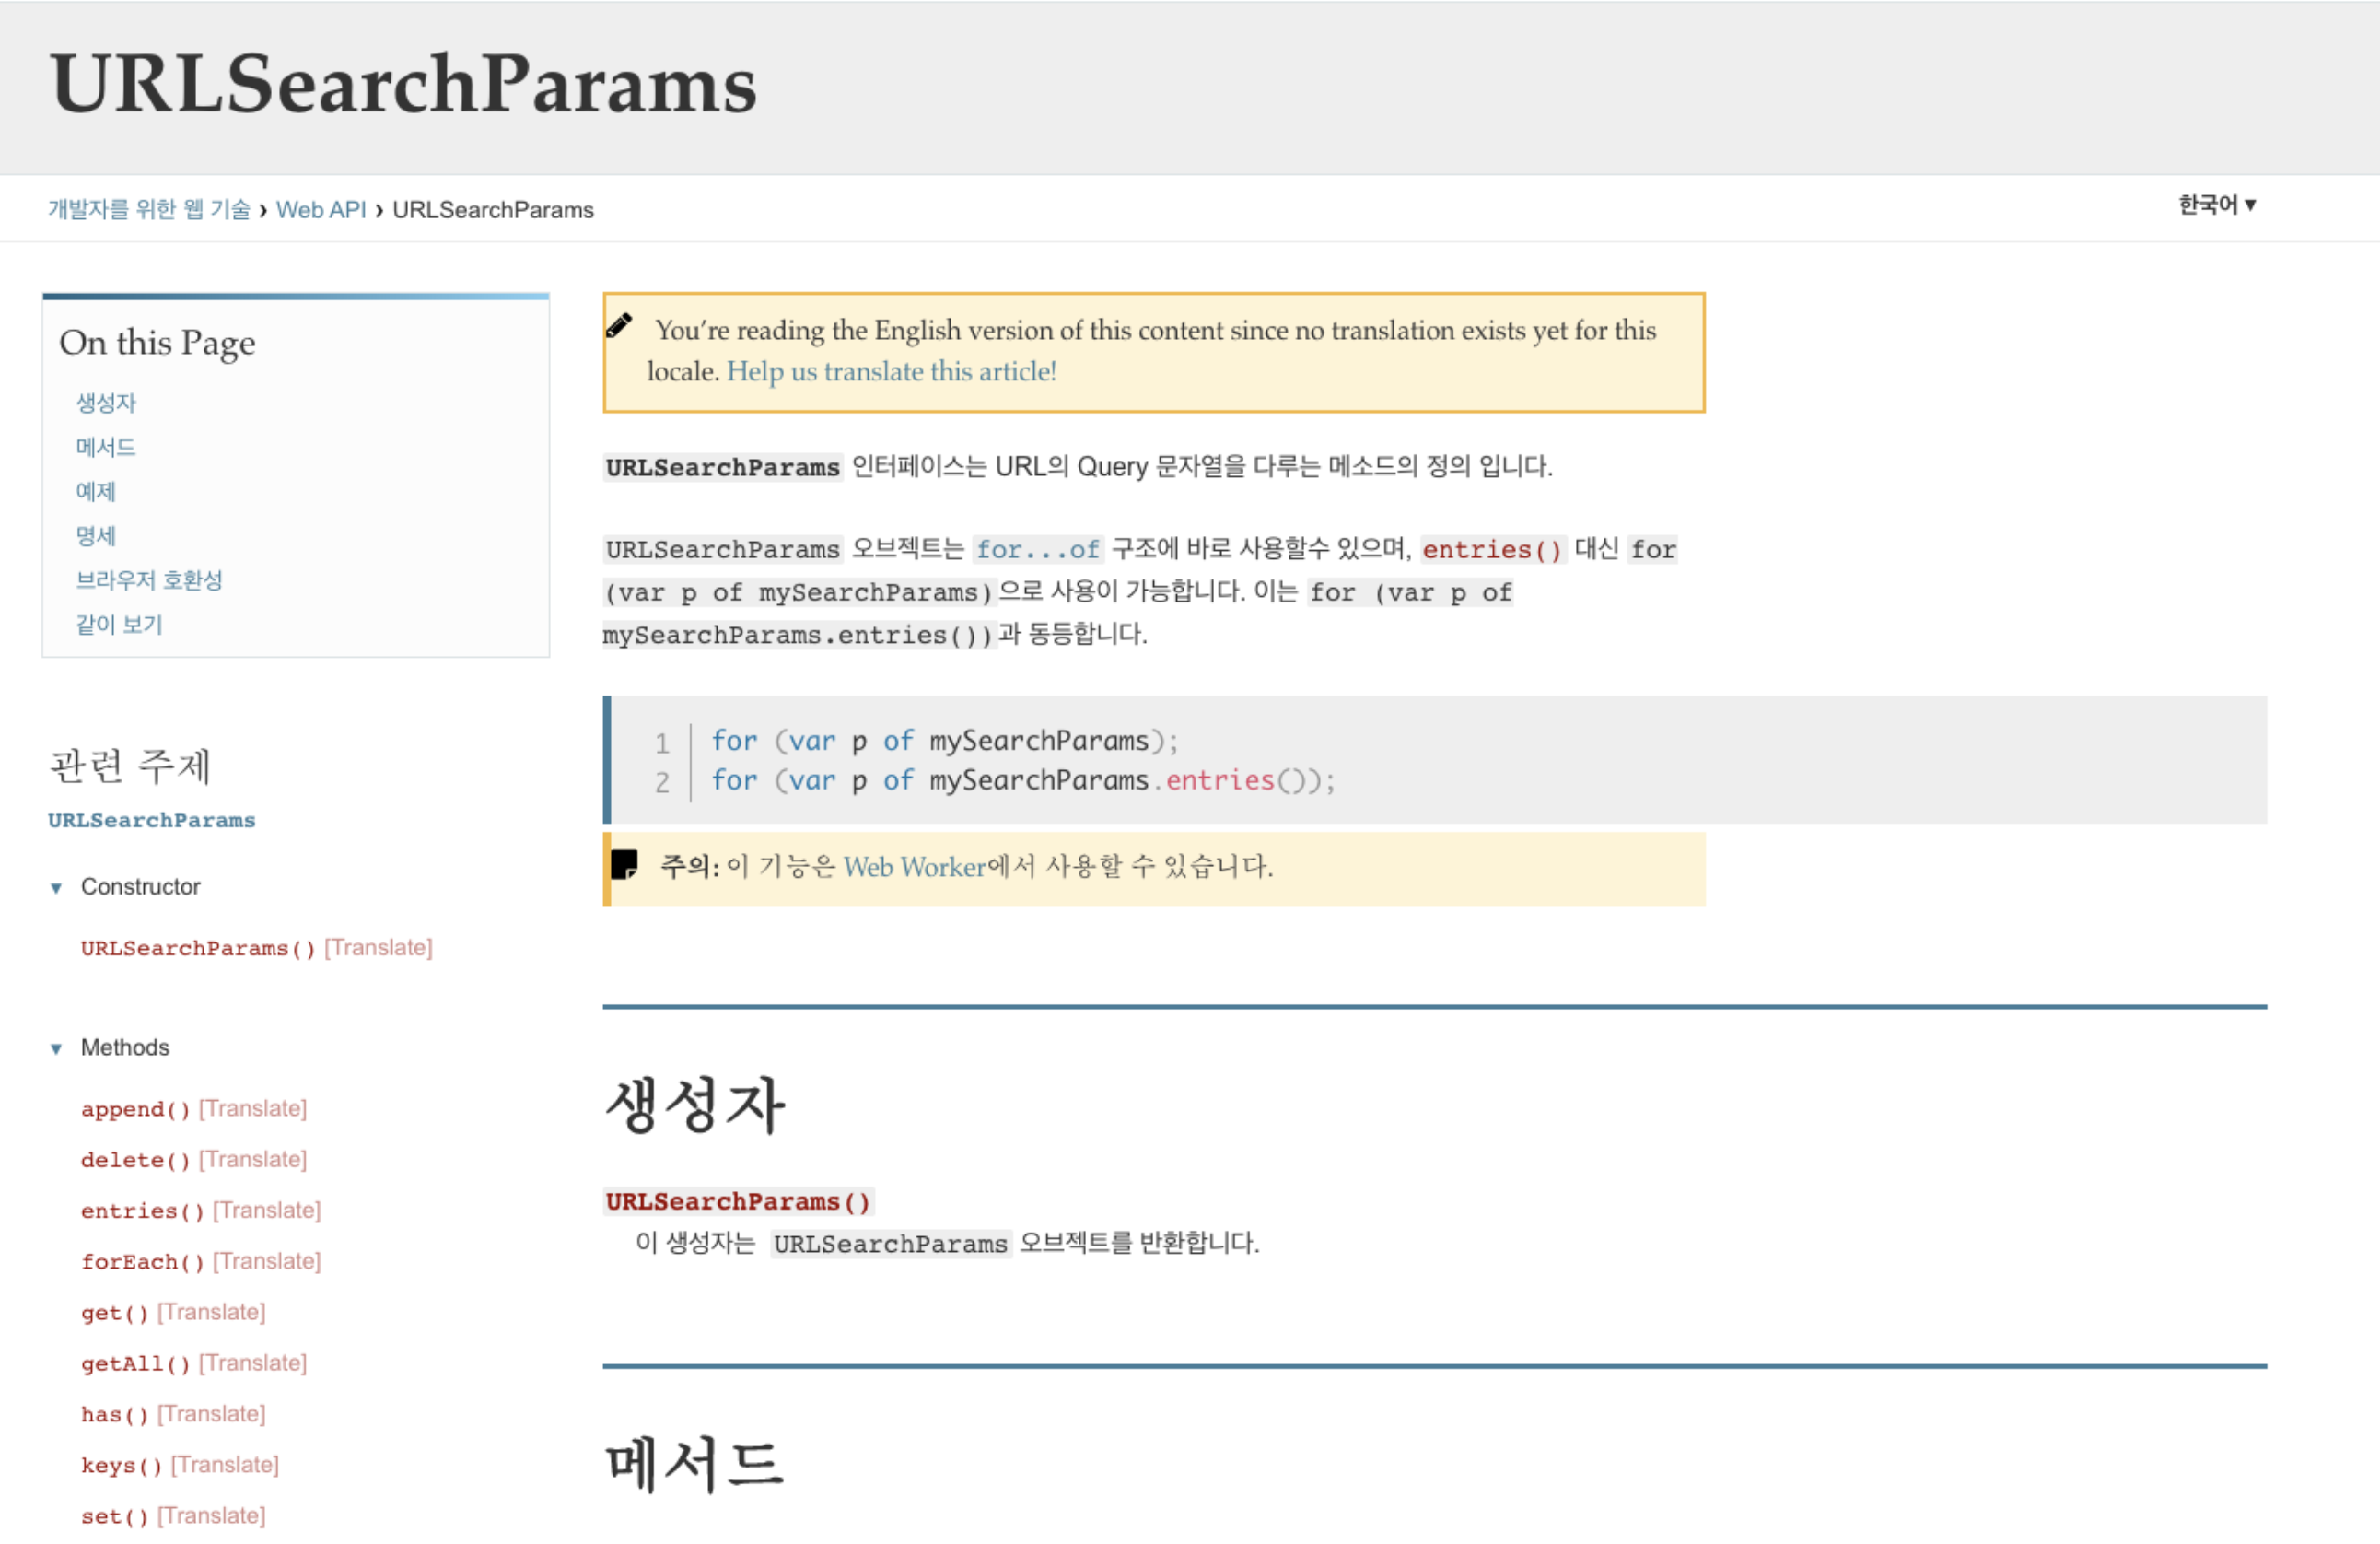
?name=mark라는 형태로 출력되게 된다. - 이렇게 출력된 부분은 제대로 쓸 수가 없기 때문에, 아래의 함수를 이용해서 query를 사용하게 된다.
// src/pages/About.jsx

export default function About(props) {
  const searchParams = new URLSearchParams(props.location.search);
  const name = searchParams.get('name');
  console.log(name);
  return (
    <div>
      <h2>About 페이지 입니다.</h2>
      {name && <p>name 은 {name} 입니다.</p>}
    </div>
  );
}
About.jsx
- 내장 객체이기에 그냥 사용하면 된다.
- 하지만 귀찮은 작업이다.
- 그렇기 때문에 아래의 방법을 사용하게 된다면, 쉽게 해결이 가능하다
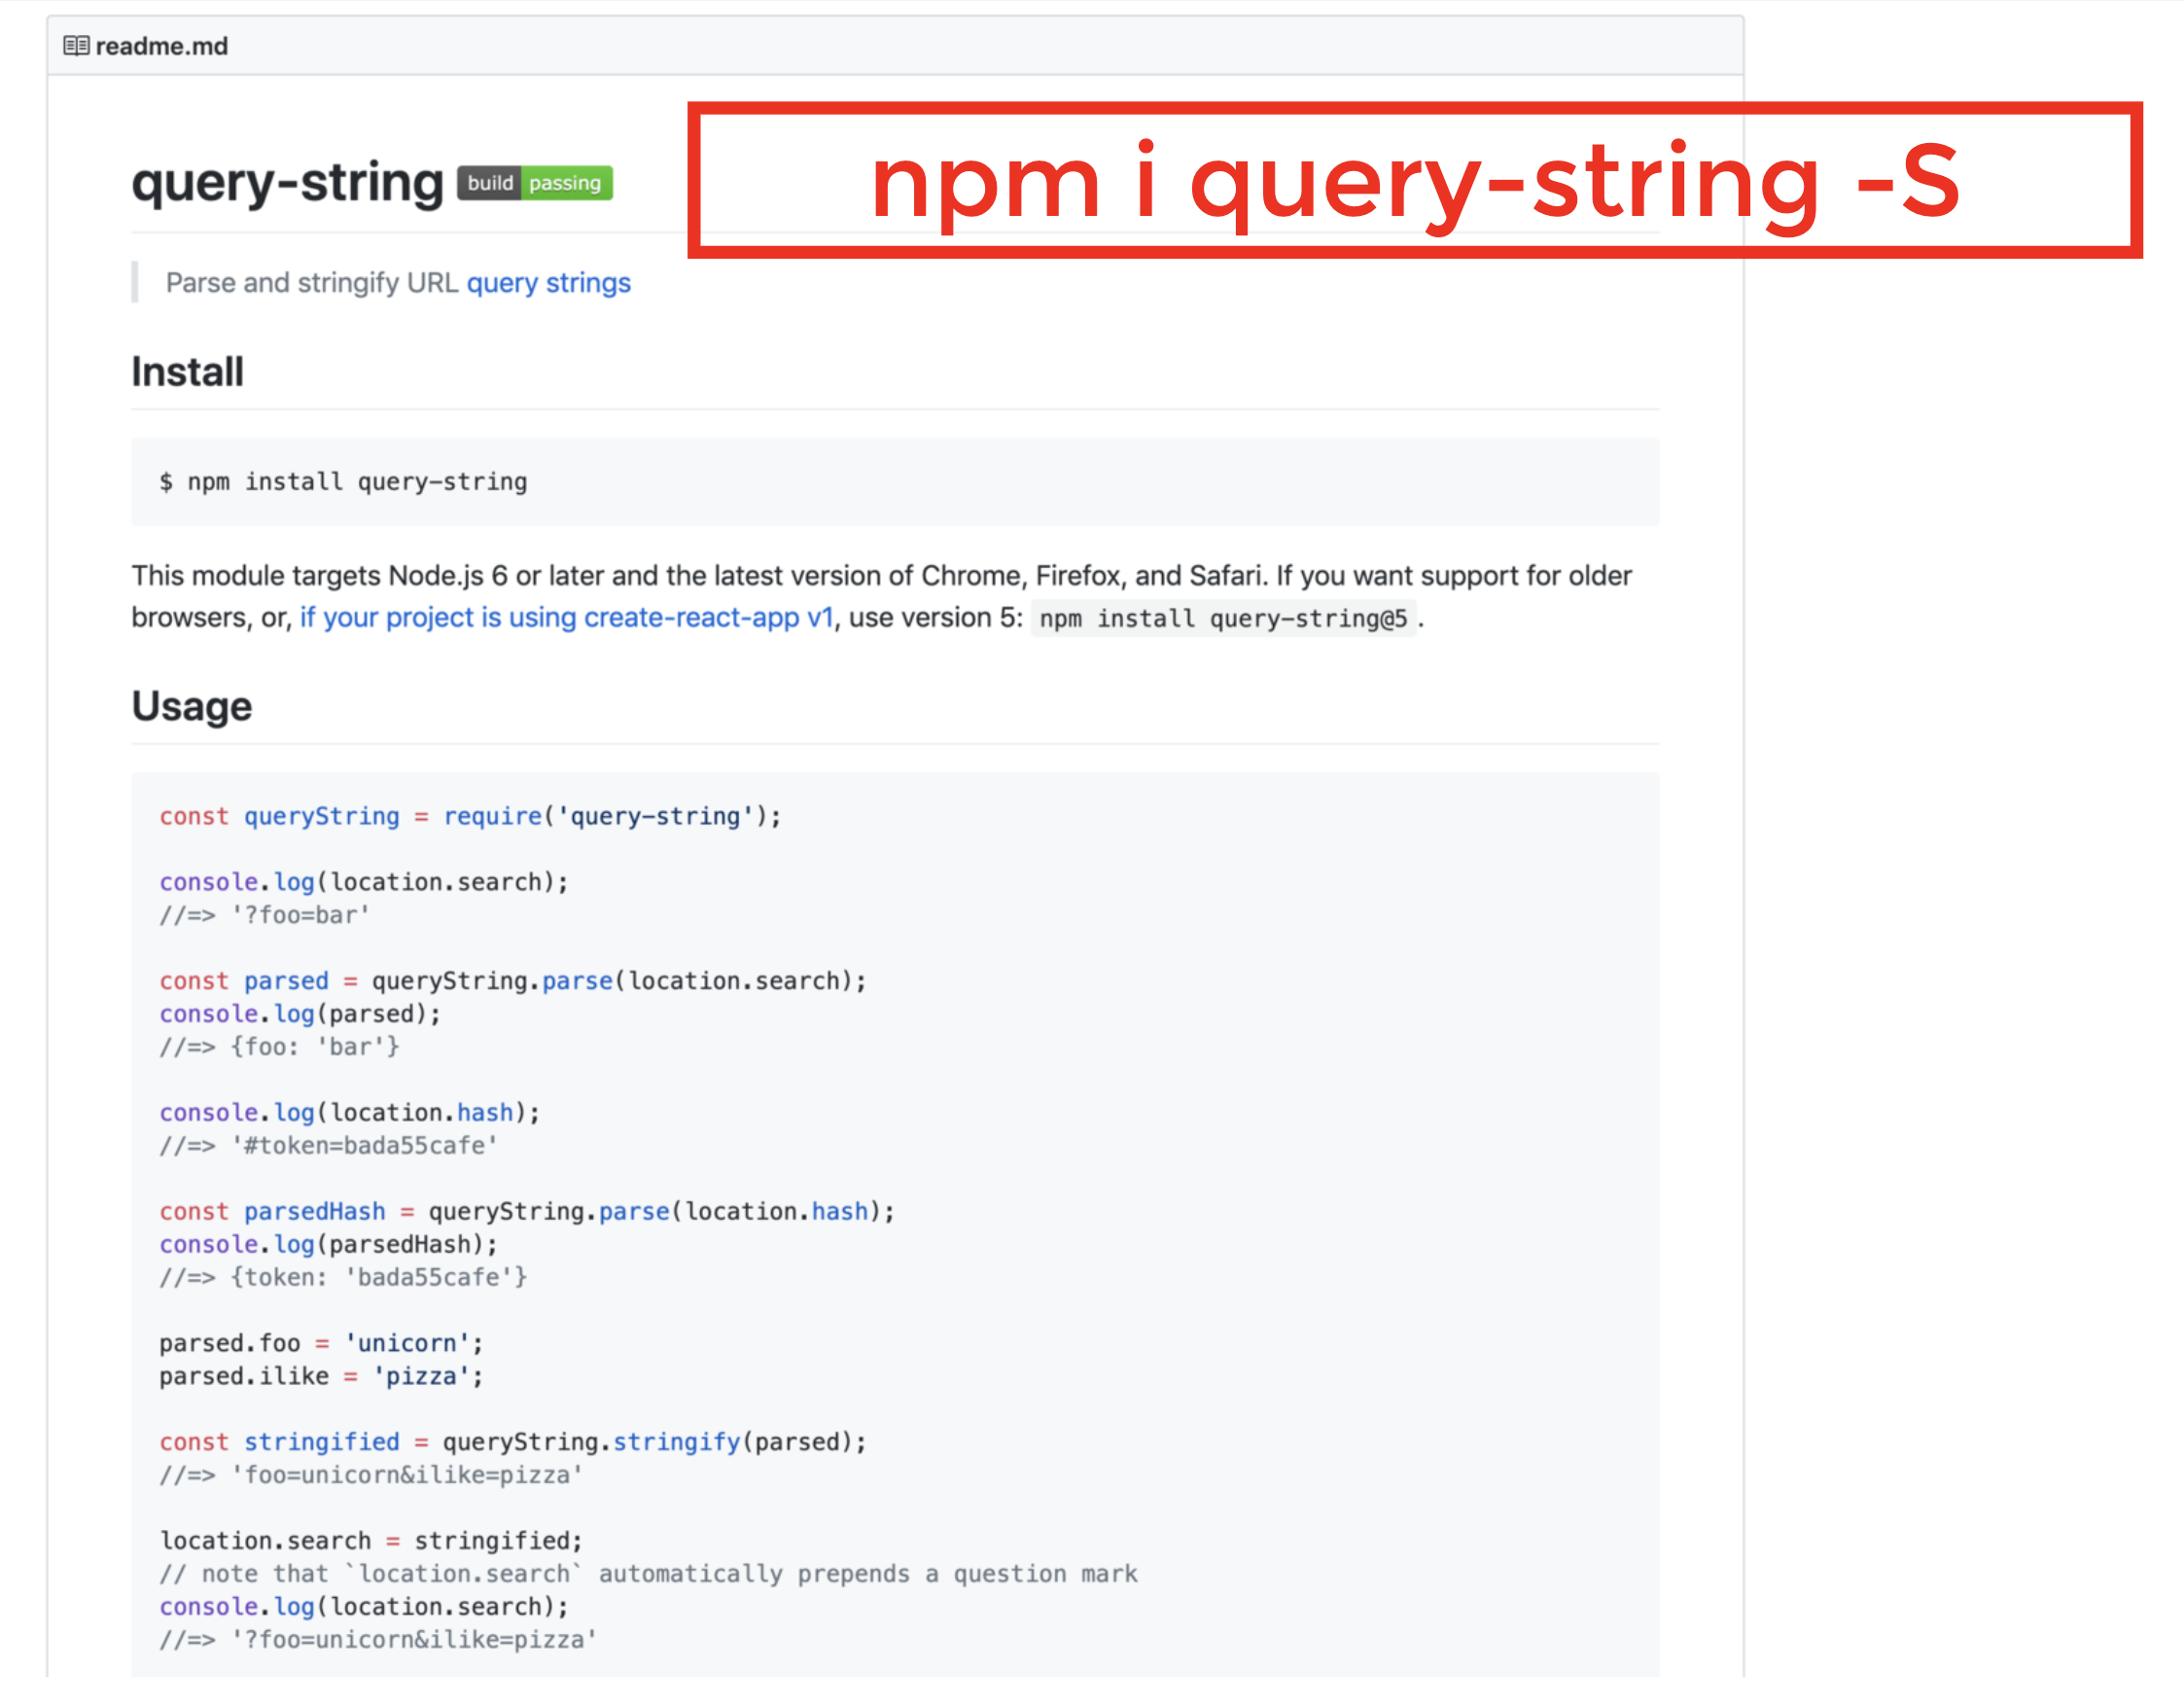
// src/pages/About.jsx

import queryString from 'query-string';

export default function About(props) {
  const query = queryString.parse(props.location.search);
  const { name } = query;
  console.log(name);
  return (
    <div>
      <h2>About 페이지 입니다.</h2>
      {name && <p>name 은 {name} 입니다.</p>}
    </div>
  );
}
NavLink
! 300
import { NavLink } from 'react-router-dom'
ActivateClassName, ActivateStyle
- activeClassName, activeStyle 처럼 active 상태에 대한 스타일 지정이 가능합니다.
- Route 의 path 처럼 동작하기 때문에 exact 가 있습니다.
import { NavLink } from "react-router-dom";

const activeStyle = { color: "green" };

export default function NavLinks() {
  return (
    <ul>
      <li>
        <NavLink to="/" exact activeStyle={activeStyle}>
          Home
        </NavLink>
      </li>
      <li>
        <NavLink to="/profile" exact activeStyle={activeStyle}>
          Profile
        </NavLink>
      </li>
      <li>
        <NavLink to="/profile/1" activeStyle={activeStyle}>
          Profile/1
        </NavLink>
      </li>
      <li>
        <NavLink
          to="/about"
          activeStyle={activeStyle}
          isActive={(match, location) =>
            match !== null && location.search === ""
            //match의 검사 유무는 ?뒤에 까지 검사하기 위함이다.
          }
        >
          About
        </NavLink>
      </li>
      <li>
        <NavLink
          to="/about?name=mark"
          activeStyle={activeStyle}
          isActive={(match, location) =>
            match !== null && location.search === "?name=mark"
            //match의 검사 유무는 ?뒤에 까지 검사하기 위함이다.ㄴ
          }
        >
          About?name=mark
        </NavLink>
      </li>
    </ul>
  );
}
App.js
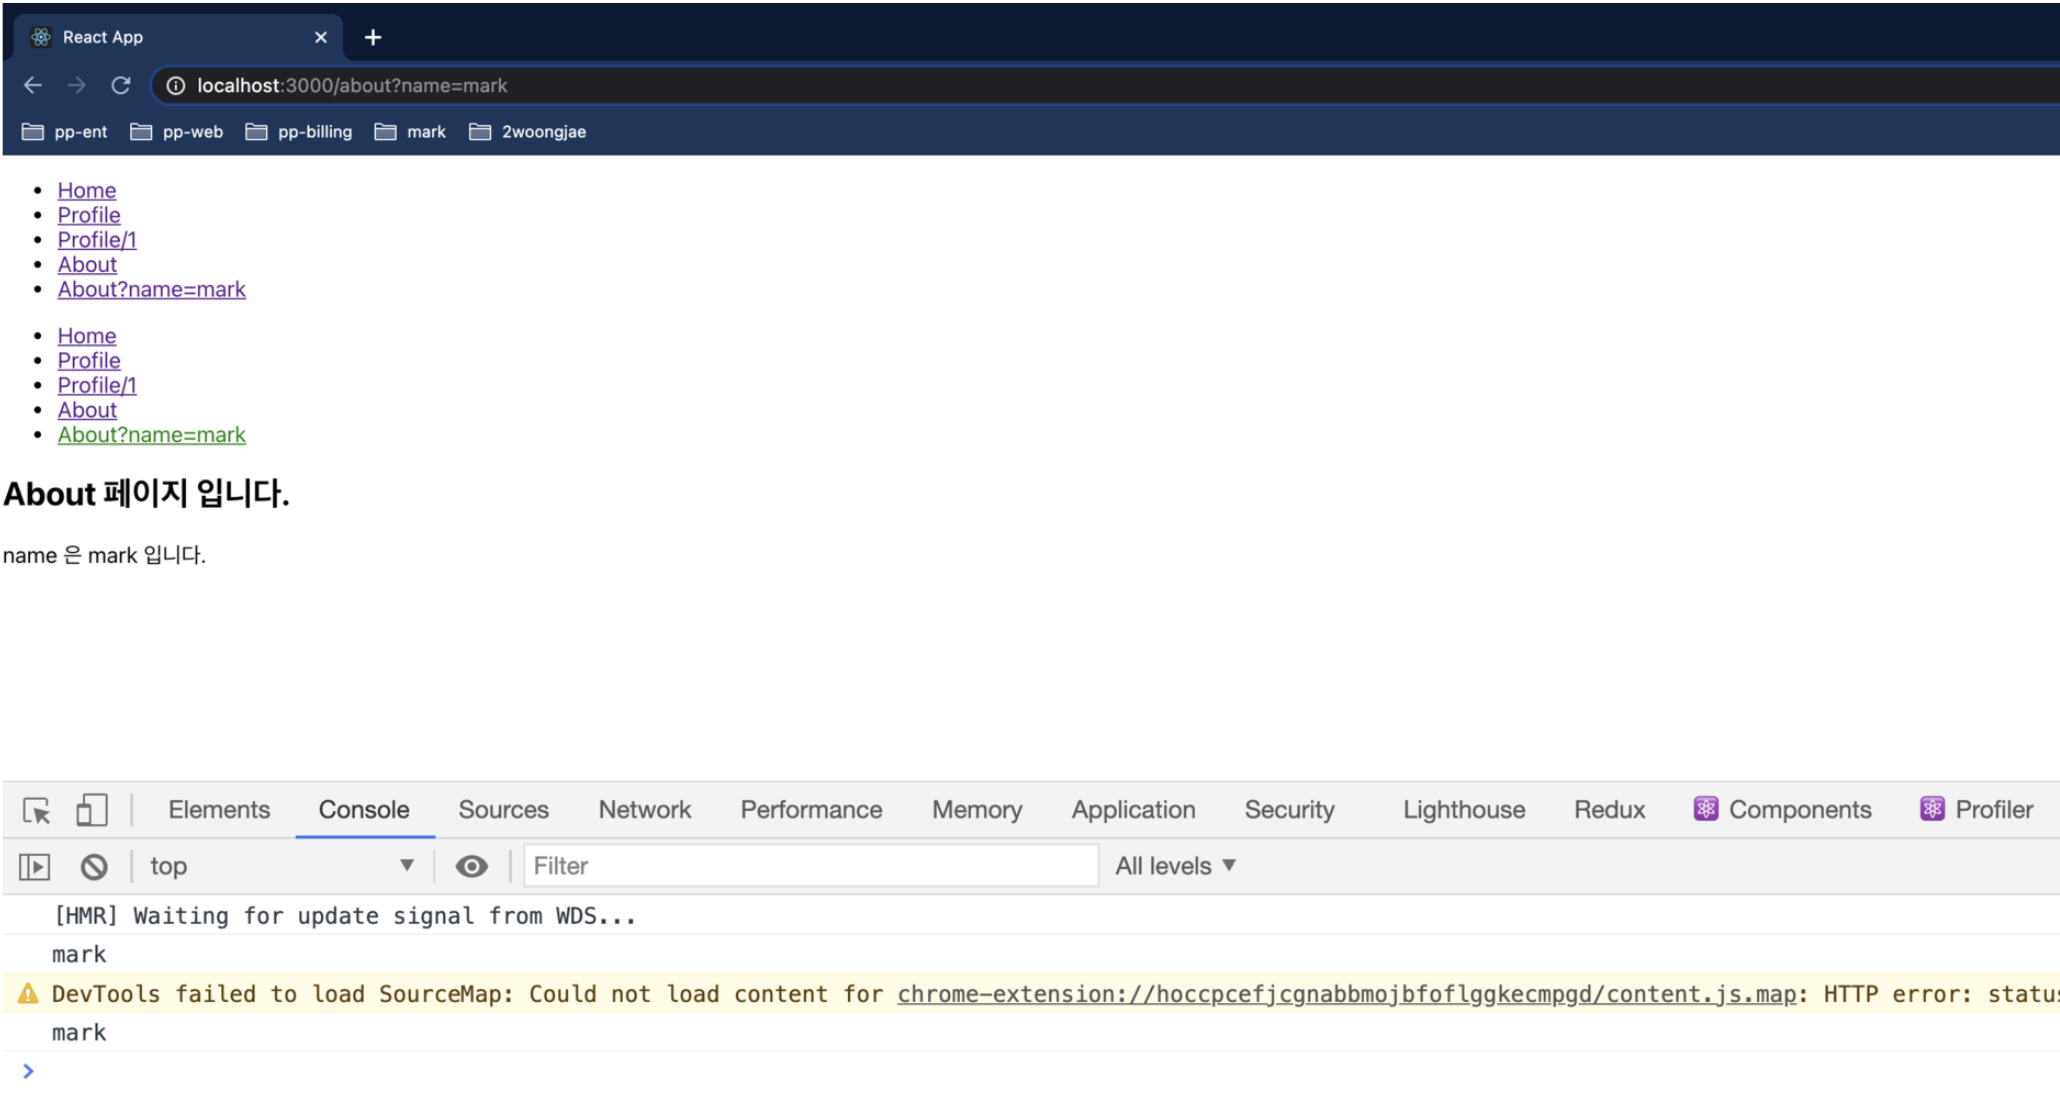
- 위의 코드를 사용하게 된다면, 현재 페이지가 어떤지에 따라서 activate Style 지정이 가능하다.
Js로 라우팅 이동하기
import { BrowserRouter, Route, Switch } from 'react-router-dom';
import Home from './pages/Home';
import Profile from './pages/Profile';
import About from './pages/About';
import NotFound from './pages/NotFound';
import Links from './components/Links';
import NavLinks from './components/NavLinks';
import Login from './pages/Login';

function App() {
  return (
    <BrowserRouter>
      <Links />
      <NavLinks />
      <Switch>
        <Route path="/login" component={Login} />
        <Route path="/profile/:id" component={Profile} />
        <Route path="/profile" component={Profile} />
        <Route path="/about" component={About} />
        <Route path="/" exact component={Home} />
        <Route component={NotFound} />
      </Switch>
    </BrowserRouter>
  );
}

export default App;
App.js
// src/pages/Login.jsx

export default function Login(props) {
  console.log(props);
  function login() {
    setTimeout(() => {
      props.history.push('/');
    }, 1000);
  }
  return (
    <div>
      <h2>Login 페이지 입니다.</h2>
      <button onClick={login}>로그인하기</button>
    </div>
  );
}
Login.js
history객체에 다양한 url 변경 방법을 볼 수 있다.- 만약, Component가 Layer의 구조가 복잡해질 때는 아래의 방법을 사용하면 된다.
// src/pages/Login.jsx

import LoginButton from '../components/LoginButton';

export default function Login() {
  return (
    <div>
      <h2>Login 페이지 입니다.</h2>
      <LoginButton />
    </div>
  );
}
Login.jsx
import { withRouter } from 'react-router-dom';

export default withRouter(function LoginButton(props) {
  console.log(props);
  function login() {
    setTimeout(() => {
      props.history.push('/');
    }, 1000);
  }
  return <button onClick={login}>로그인하기</button>;
});
LoginButton.jsx
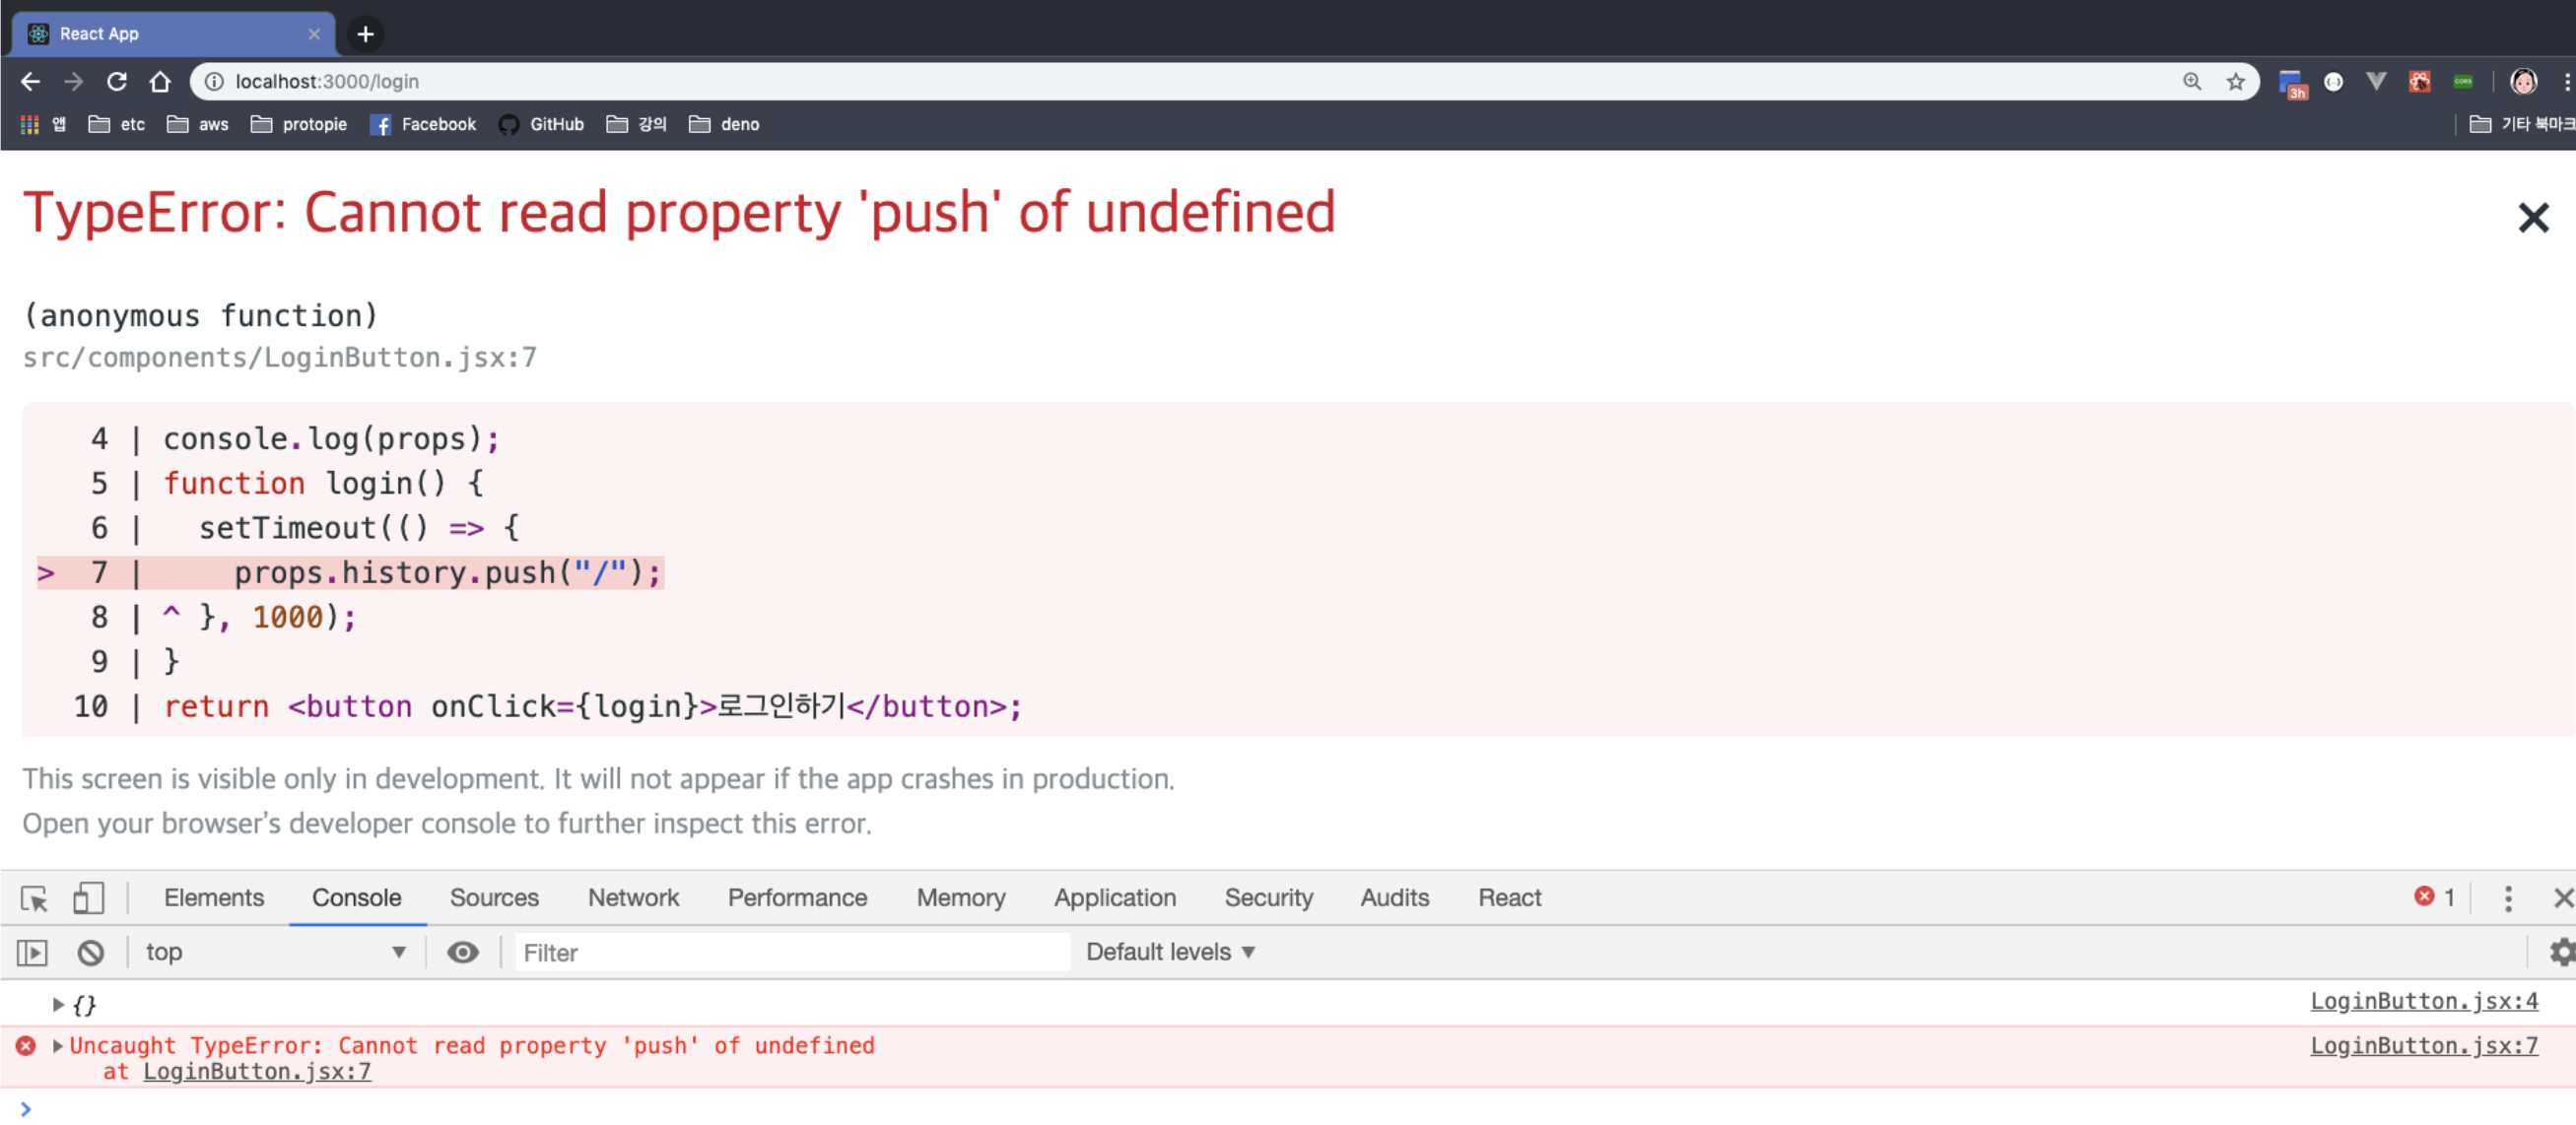
- 위의 에러가 나오게 된다.
props객체이다. 하지만, 이 안에는 해당history를 추측 할 수 없다.- 이유는, 해당
props에 대한 정보가 넘어오지 않았기에, 해당 정보가 없는 것이다.
- 이유는, 해당
- 그래서 아래처럼
props를 전달을 하여서 history를 추출한다.
// src/pages/Login.jsx

import LoginButton from '../components/LoginButton';

export default function Login(props) {
  return (
    <div>
      <h2>Login 페이지 입니다.</h2>
      <LoginButton {...props}/>
    </div>
  );
}
import { withRouter } from 'react-router-dom';

export default withRouter(function LoginButton(props) {
  console.log(props);
  function login() {
    setTimeout(() => {
      props.history.push('/');
    }, 1000);
  }
  return <button onClick={login}>로그인하기</button>;
});
- 해당 방법은 좋은 방법은 아니기 때문에, 이 방법은 지양하고 있다.
- React는 그렇기 때문에 두가지 정도를 지향하고 있다
Redirect
import { Redirect } from 'react-router-dom';

// jsx
<Redirect to='/' />
실습
import { BrowserRouter, Route, Switch, Redirect } from 'react-router-dom';
import Home from './pages/Home';
import Profile from './pages/Profile';
import About from './pages/About';
import NotFound from './pages/NotFound';
import Links from './components/Links';
import NavLinks from './components/NavLinks';
import Login from './pages/Login';

const isLogin = true;

function App() {
  return (
    <BrowserRouter>
      <Links />
      <NavLinks />
      <Switch>
        <Route
          path="/login"
          render={() => (isLogin ? <Redirect to="/" /> : <Login />)} // isLogin이 True 일 때, Redirect로 home으로 간다
        />
        <Route path="/profile/:id" component={Profile} />
        <Route path="/profile" component={Profile} />
        <Route path="/about" component={About} />
        <Route path="/" exact component={Home} />
        <Route component={NotFound} />
      </Switch>
    </BrowserRouter>
  );
}

export default App;