개발 환경
Java 11, Intellij
start.spring.io
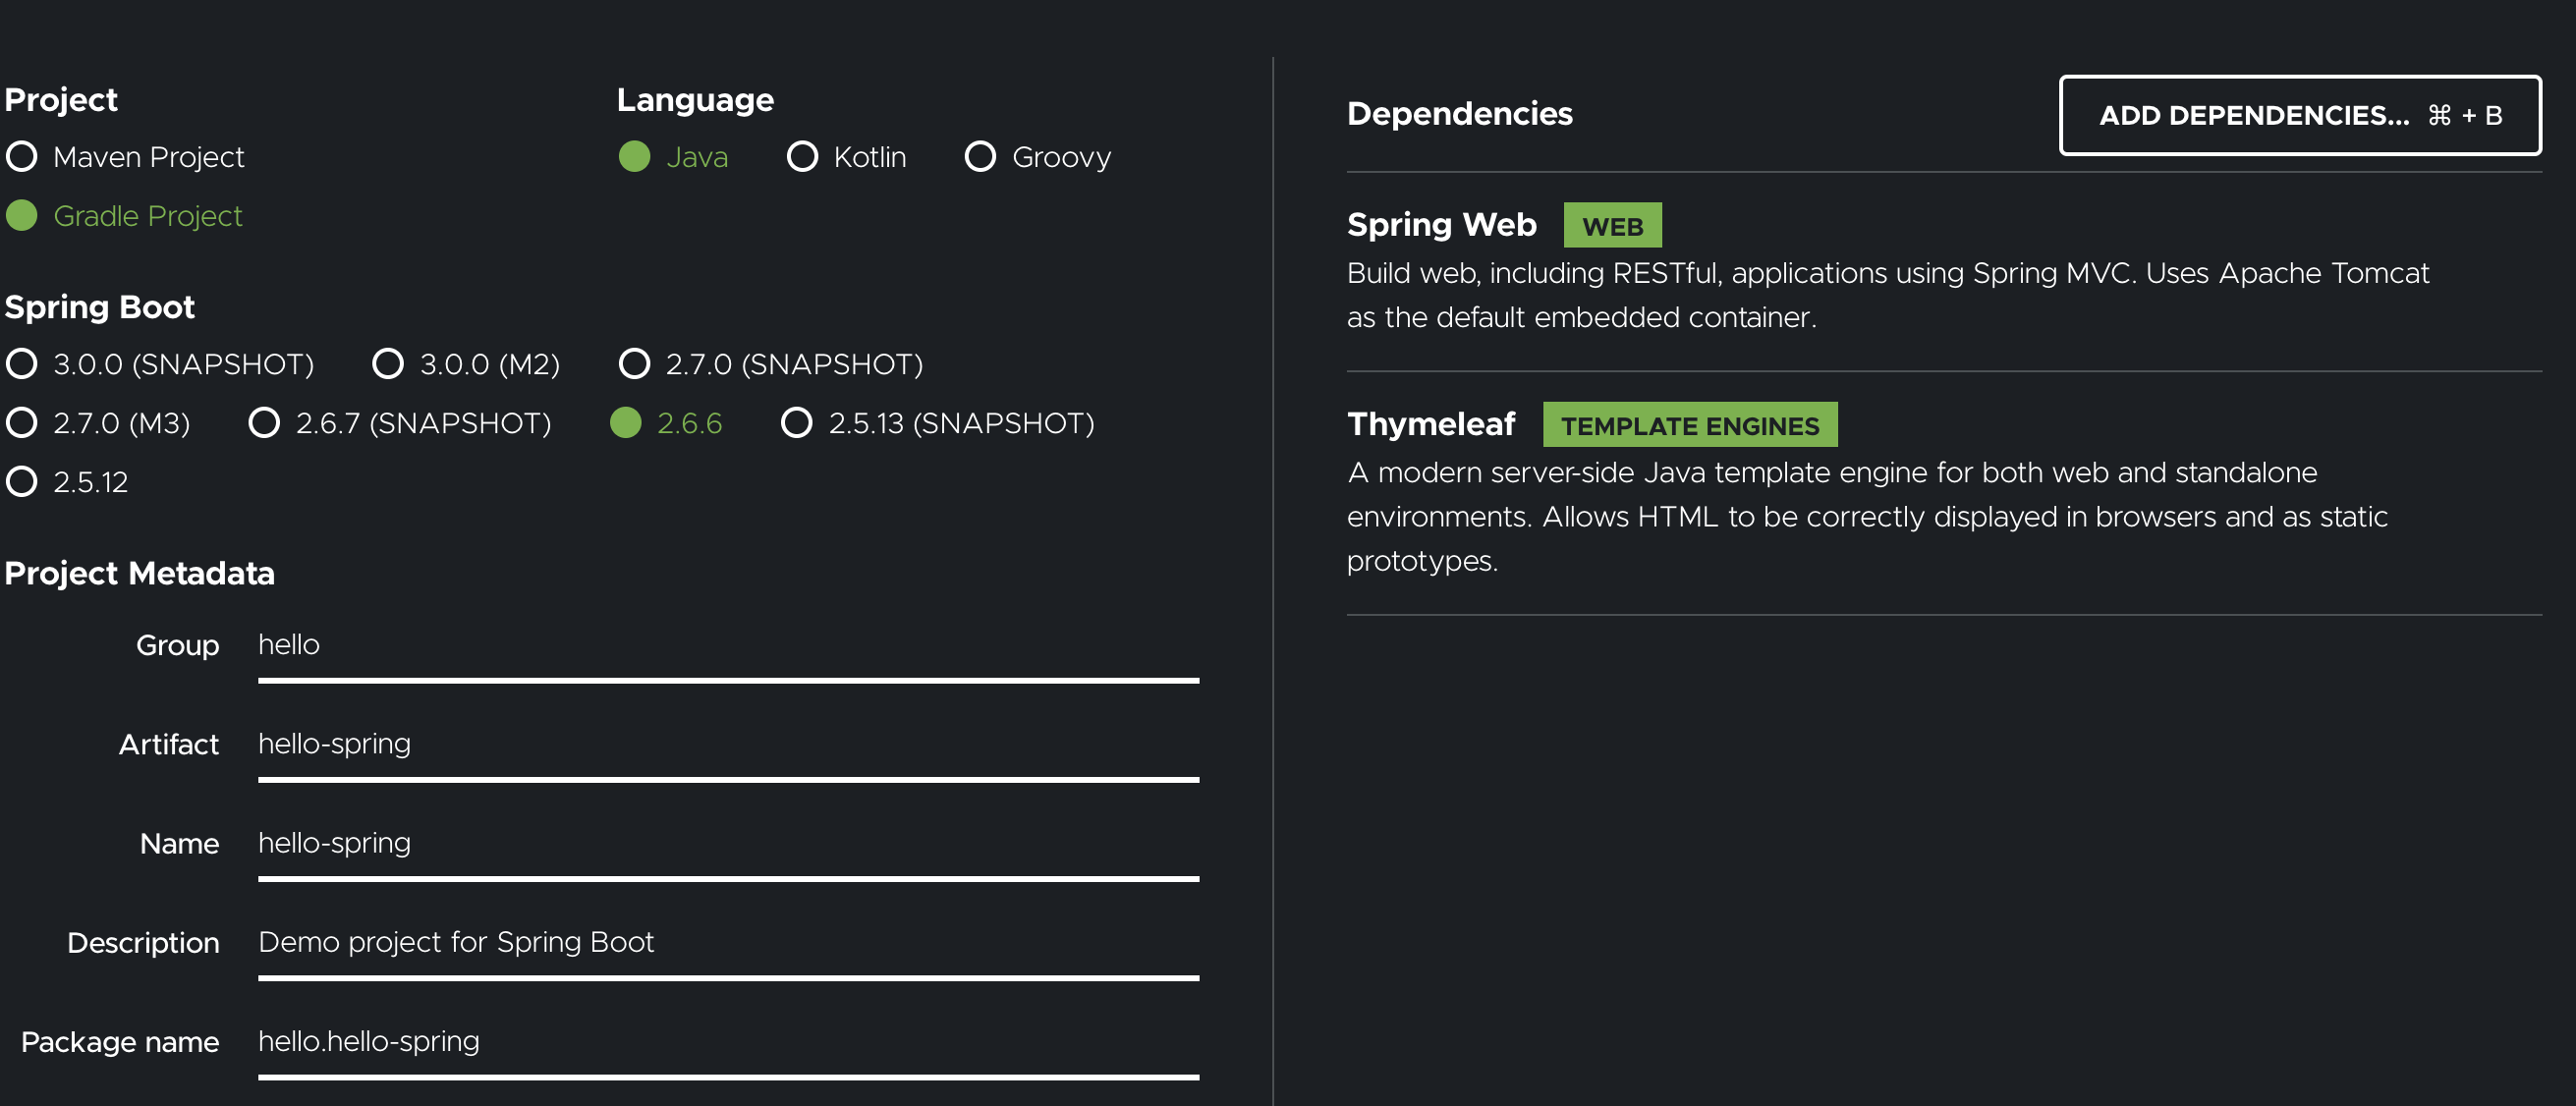
sping파일을 다운로드 하고 난 후에 intellij에서 실행
src파일
! 400
- main
- 현 우리가 작성하는 코드
- test
- test 코드 작성
- resources
- html, 자바의 설정 파일
- 자바를 제외한 파일들이 들어가는 곳
build.gradle
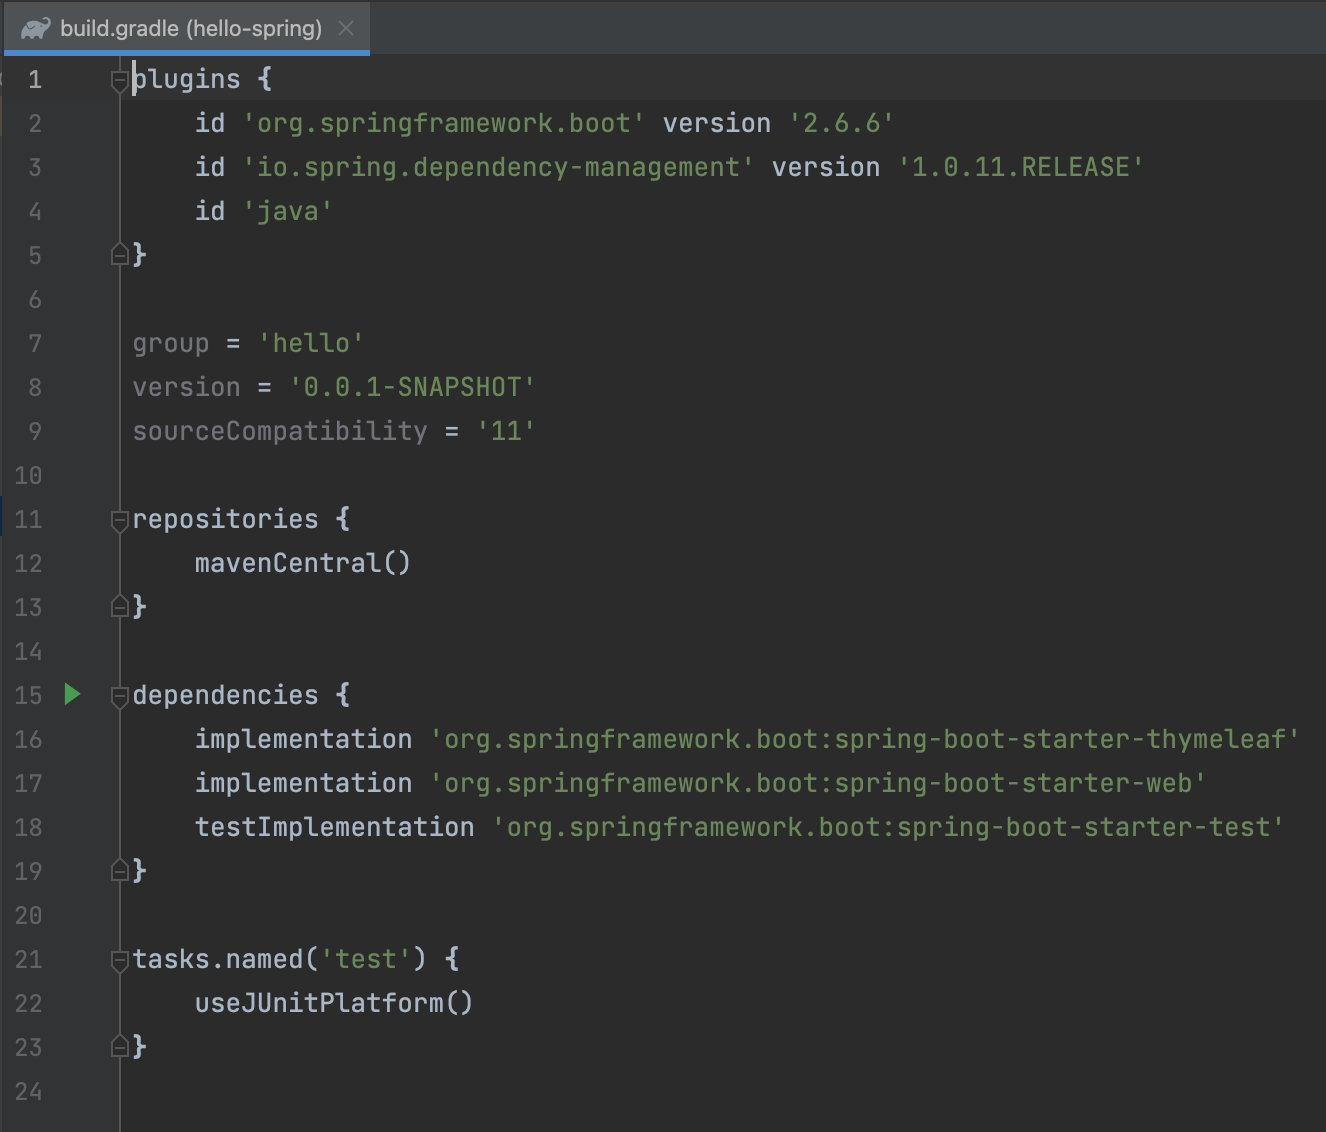
- 버전 설정
- 라이브러리 가져오는 용도
dependencies
→ implementation → 위 springboot에서 선택한 라이브러리임
Views
index.html은
main/resources/static 파일 안에 넣어야함
공식 문서
thymeleaf 동작확인

Controller
- nodejs에서 modules와 개념이 비슷함
package hello.hellospring.controller;

import org.springframework.stereotype.Controller;
import org.springframework.ui.Model;
import org.springframework.web.bind.annotation.GetMapping;

@Controller
public class HelloController {

    @GetMapping("hello")
		//url창에 /hello 가 get으로 받을 시에
    public String hello(Model model){
        model.addAttribute("data", "hello!!");
				//thymeleaf에 data라는 이름으로 데이터를 담아서 전송시킴
        return "hello";
				//templete파일에 있는 hello라는 이름의 파일을 리턴(렌더링해라)
    }
}
<!DOCTYPE html>
<html xmlns:th="http://www.thymeleaf.org" lang="en">
<head>
    <meta charset="UTF-8">
    <title>Title</title>
</head>
<body>
<p th:text="'안녕하세요.' + ${data}">안녕하세요. 손님</p>
</body>
</html>
빌드 하고 실행하기
터미널에서 spring 프로젝트로 디렉토리 옮기기(mac기준)
cd /Users/jinmin/Desktop/MyData/Project/SpringBoot/hello-spring
./gradlew build
빌드가 실행됨
cd build/libs
ls -arlth
java -jar hello-spring-0.0.1-SNAPSHOT.jar


./gradlew clean build
만약 잘 안된다면 cleanbuild를 해서 build를 없애고 시작해보기
spring이 실행 됨을 알수 있다. → 서버 배포시에 해당 파일을 복사해서 그대로 실행을 시키면 된다.
정적파일
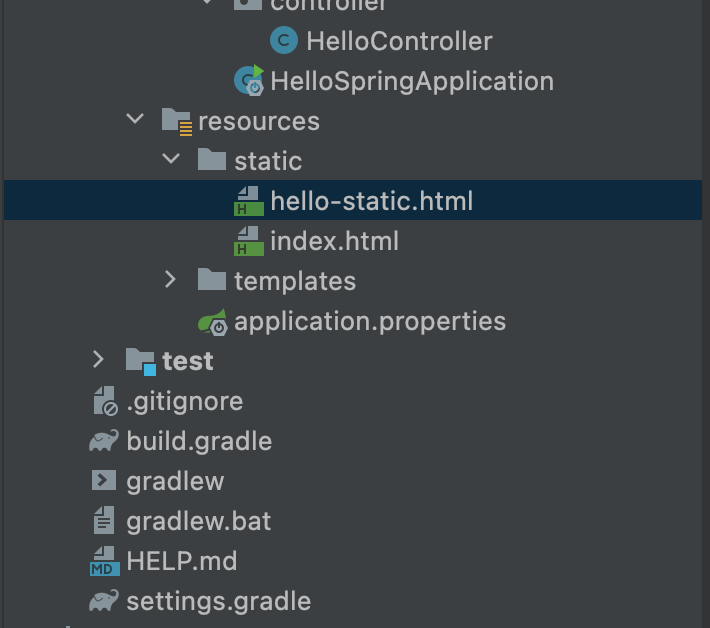
static파일에 html파일을 생성하고 그 이름으로
localhost:8080/hello-static.html
이라고 검색하면 controller가 없어도 자동으로 불러와준다.
→ 대신 프로그래밍은 불가능(즉, 그냥 정적인 파일만 가능함)
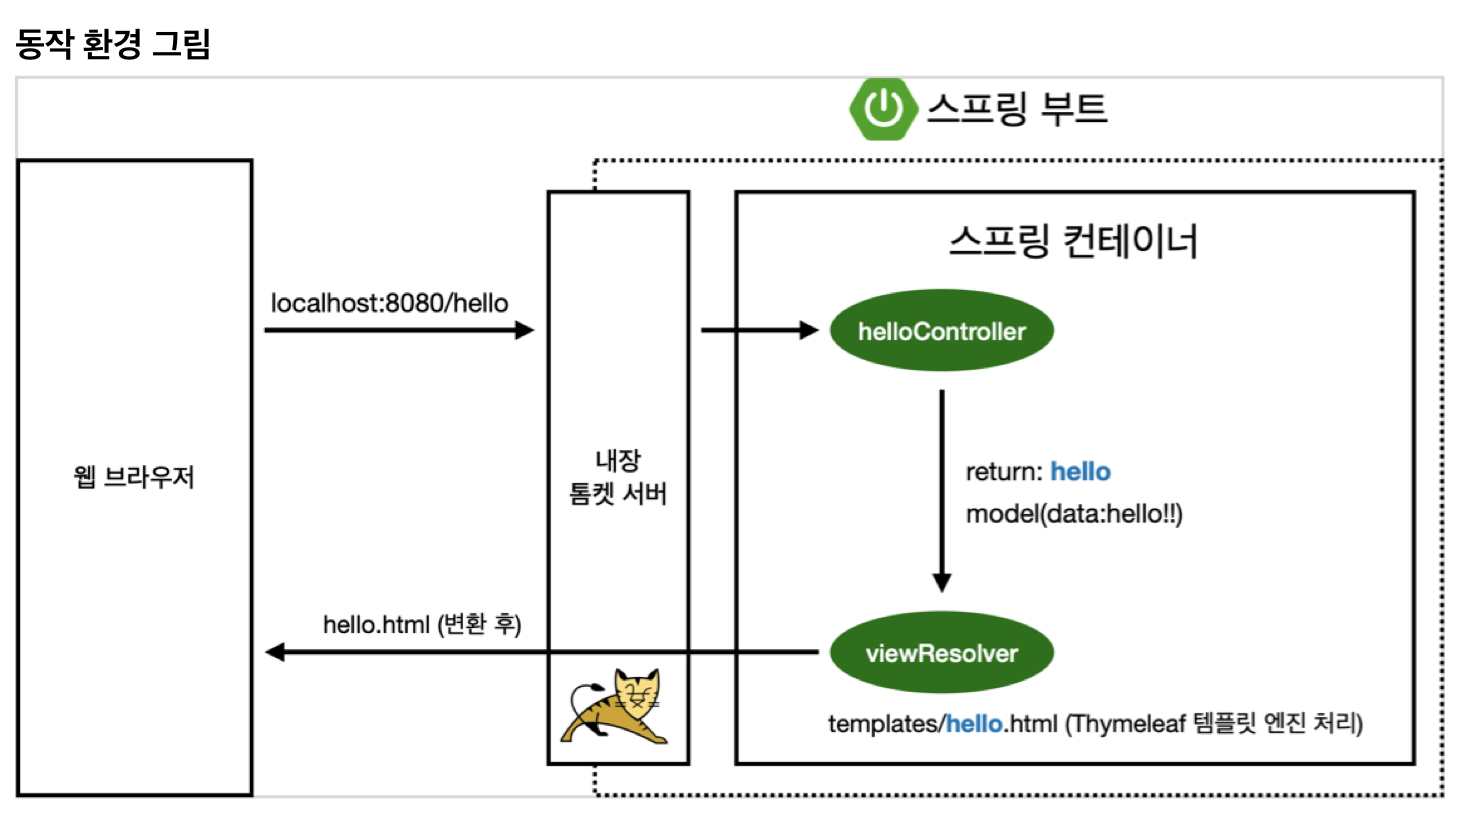
MVC와 템플릿 엔진
MVC : Model, View, Controller
View
→ 쉽게 생각해서 프론트 엔드, html파일을 이용해서 클라이언트에게 보여지는 화면을 보여준다.
Controller
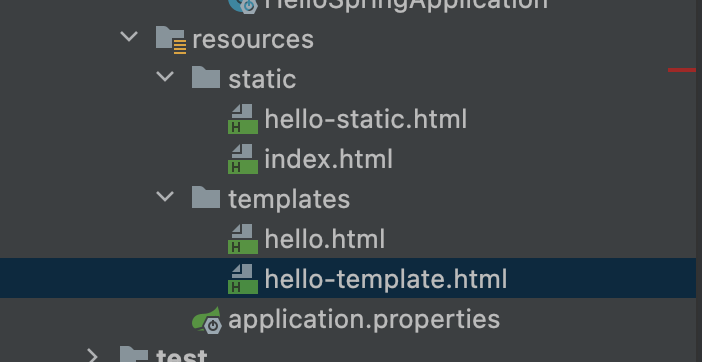
Controller와 관련된 파일이라면 view파일을 template 폴더에 생성해야한다.
<!DOCTYPE html>
<html xmlns:th="http://www.thymeleaf.org" lang="en">
<head>
    <meta charset="UTF-8">
    <title>Title</title>
</head>
<body>
<p th:text="'hello'+${name}">hello! empty</p>
</body>
</html>
hello! empty를 쓰는 이유는 서버 없이 html을 보고 싶을 때 에러가 걸리지 않고 바로 볼 수 있게끔 하는 장치이다. (node는 있나.. 살펴봐야겠다.
@Controller
public class HelloController {

	...
	@GetMapping("hello-mvc")
	    public String helloMvc(@RequestParam("name") String name, Model model){
	        model.addAttribute("name", name);
	        return "hello-template";
	    }
	...
}
→ 실행 시 에러가 난다. 이유는 RequestPrarm에 있다. 이 부분이 url에서 (node에서 파라미터 동일한 부분)
즉, ?name=원하는데이터 를 url에 적어야지 실행이된다.

(내장 톰켓 서버 - nodejs에서 middleware와 비슷한 개념인듯)
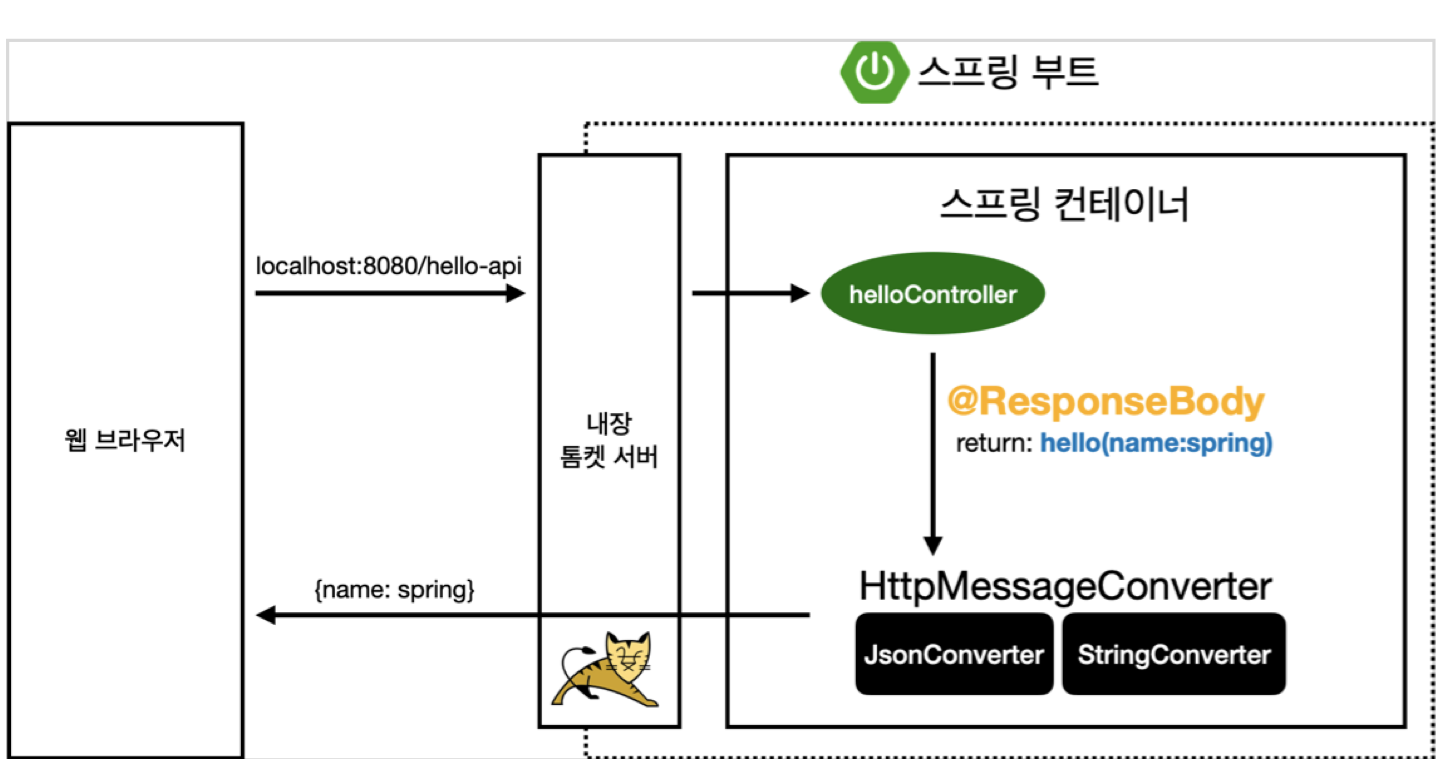
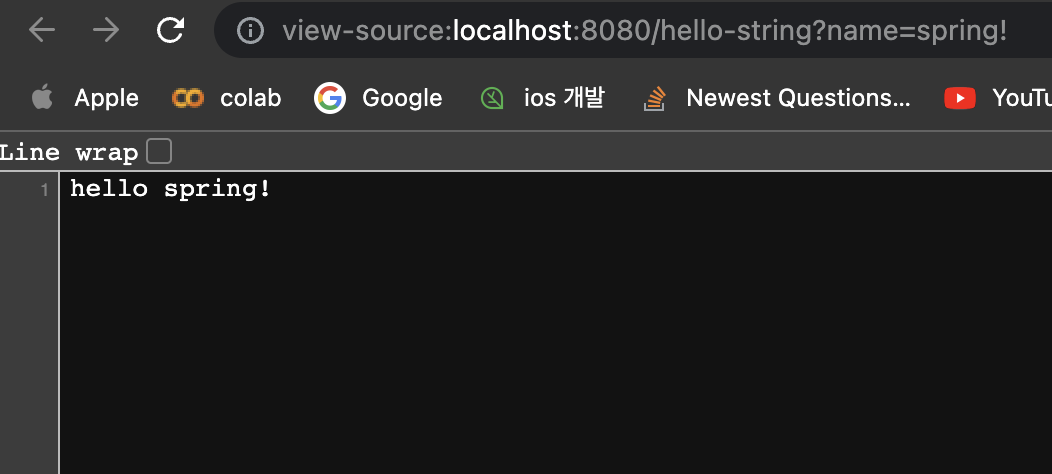
API
ResponseBody : http에서 body부분에 return 한 데이터를 직접 넣어주겠다. → view부분이 없고 바로 다이렉트로 뜬다.
@Controller
public class HelloController {

	...
	@GetMapping("hello-string")
	    @ResponseBody
	    public String helloString(@RequestParam("name") String name){
	        return "hello "+ name;
	    }
	...
}
JSON파일 처럼 변환하기
@Controller
public class HelloController {

	...
	@GetMapping("hello-api")
	    @ResponseBody
	    public Hello helloApi(@RequestParam("name") String name){
	        Hello hello = new Hello();
	        hello.setName(name);
	        return hello;
	    }

	    static class Hello{
	        private String name;

	        public String getName(){
	            return name;
	        }
	        public void setName(String name){
	            this.name = name;
	        }
	    }
	...
}
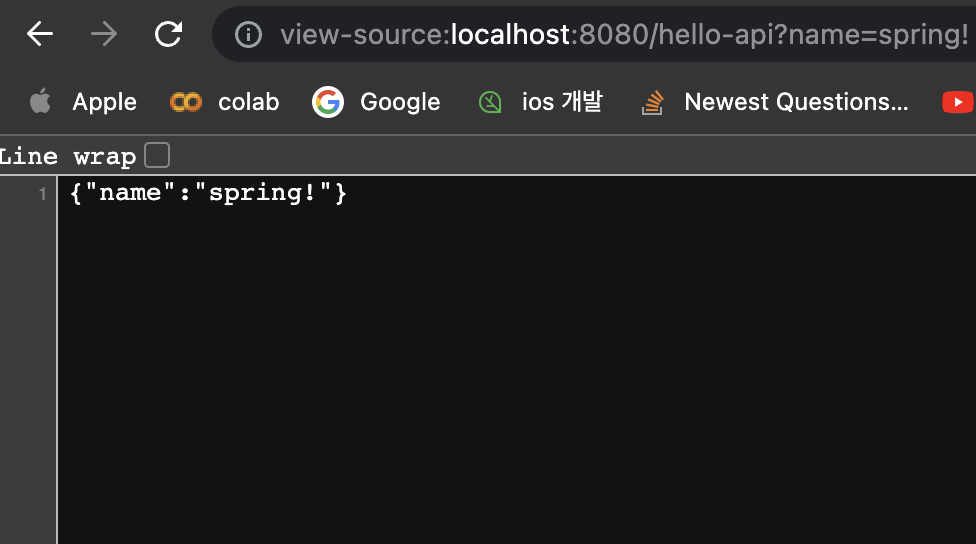
이 방식을 api라고 한다.
→ 기본적으로 객체를 반환하면 JSON으로 반환되는게 default값이다.
*단축ㄱ
command + N : Getter and Setter → 프로퍼티 접근 방식
httpMessageConverter가 객체로 판단이 되면 → JSON으로 반환
httpMessageConverter가 String으로 판단이 되면 → Text로 반환
Jackson → 객체 처리 라이브러리